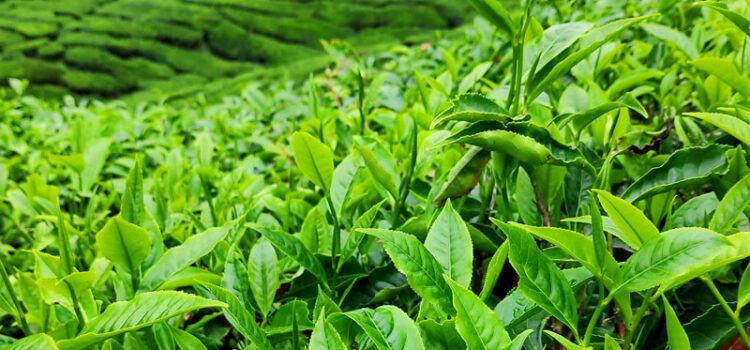
Tea farming is the cultivation of tea plants for the production of tea leaves, which are processed and consumed as a popular beverage worldwide. Tea farming and processing can be a profitable venture if done correctly. Here’s an overview of tea farming, including key steps and considerations:

Tea Farming:

  1. Site Selection:

Choose a suitable location for tea cultivation. Tea plants thrive in regions with high rainfall, well-drained acidic soil, and temperatures ranging from 20 to 30 degrees Celsius. Altitude can also affect tea quality, with higher elevations often producing finer teas.

   2. Variety Selection:

Select the appropriate tea variety based on your climate, soil conditions, and market demand. Common tea varieties include Camellia sinensis (used for black, green, and oolong teas) and Camellia assamica (used for Assam and Ceylon teas). Consult local agricultural experts or nurseries to determine the best varieties for your specific region.

    3. Land Preparation:

Clear the land of weeds, rocks, and debris. Conduct a soil analysis to determine pH levels and nutrient content. Tea plants prefer slightly acidic soil, so amendments may be necessary to adjust pH if needed. Prepare the land by plowing, tilling, and incorporating organic matter.

   4. Planting:

Tea plants can be propagated from seeds or cuttings. Vegetative propagation through cuttings is the most common method for ensuring uniformity and quality. Plant the tea bushes at the recommended spacing, typically in rows. Provide shade and wind protection, if necessary, especially for young tea plants.

    5. Irrigation and Nutrient Management:

Provide regular irrigation to tea plants, especially during dry periods. Adequate water supply is essential for healthy growth and optimal yield. Implement a nutrient management plan to ensure the plants receive balanced nutrition, considering factors such as soil fertility, leaf analysis, and local agricultural recommendations.

    6. Pruning and Maintenance:

Regularly prune the tea bushes to promote new growth and maintain their shape. Implement proper weed and pest control measures, and ensure sufficient irrigation and nutrient management.

     7. Harvesting:

Harvest the tea leaves when they reach the desired maturity, which varies depending on the tea type. Generally, the top two leaves and the bud are plucked. Hand plucking or machine harvesting can be employed.

    8. Quality Control:

Implement quality control measures throughout the entire tea production process. Conduct regular sampling, tasting, and sensory evaluation to ensure consistent quality. Adhere to local and international standards for tea production and processing.

Tea Processing:

  1. Withering:

After harvesting, the tea leaves undergo withering, where they are spread out on racks or mats to wilt and lose moisture. This process prepares the leaves for subsequent processing steps.

      2. Rolling:

Rolled tea leaves undergo mechanical rolling, which breaks down the leaf cells and releases the enzymes necessary for fermentation. This step contributes to the flavor development.

     3. Fermentation/Oxidation:

Depending on the type of tea desired (e.g., black, green, oolong), the tea leaves are either fermented or oxidized to various degrees. This step is crucial for the flavor and color development.

   4. Drying:

The fermented or oxidized leaves are dried to halt the oxidation process. Drying can be achieved through various methods, including sun drying, oven drying, or mechanical drying. This step reduces the moisture content and stabilizes the tea leaves.

   5. Sorting and Grading:

After drying, the tea leaves are sorted and graded based on their size, quality, and appearance. This process ensures uniformity and enables proper pricing and marketing.

6. Packaging and Marketing:

Pack the processed tea leaves in attractive and appropriate packaging materials to maintain freshness and quality. Develop marketing strategies to target wholesalers, retailers, tea shops, or even direct-to-consumer sales. Consider online platforms, local markets, and specialty stores to reach potential customers.

Additional Income Streams:

  1. Specialty Teas:

Explore the production of specialty teas, such as flavored teas, herbal blends, or organic teas, which often fetch higher prices in the market.

     2. Value-Added Products:

Consider diversifying your product range by producing tea powders, tea bags, ready-to-drink bottled teas, or tea-based cosmetics and skincare products.

     3. Agro-Tourism:

Utilize your tea plantation as a tourist attraction. Offer guided tours, tea tastings, and educational experiences to visitors, creating an additional revenue stream.

     4. Tea Gardens and Accommodation:

If the location permits, establish a tea garden with a café or restaurant. Provide accommodation for tourists and tea enthusiasts, offering a complete tea experience. It’s crucial to stay updated on market trends, consumer preferences, and quality standards. Building strong relationships with buyers, maintaining consistent quality, and effectively promoting your tea products will contribute to the success and profitability of your tea farming and processing business

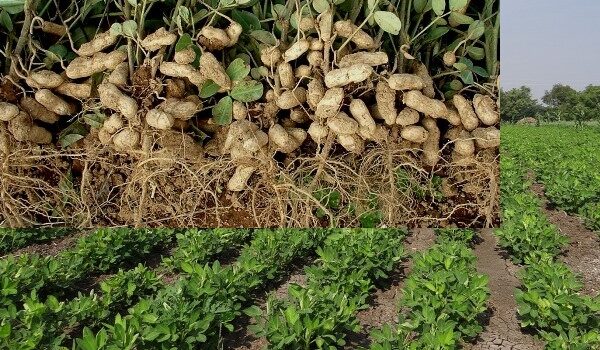
Groundnut farming, also known as peanut farming, is the process of cultivating and harvesting groundnuts for various purposes, including human consumption and oil production. Marketing in groundnut farming involves the activities related to promoting, distributing, and selling groundnuts and their derived products. Here’s an overview of groundnut farming and its marketing process:

Groundnut Farming:

  1. Selecting the Right Variety:

Choose a groundnut variety suitable for your region, considering factors like climate, soil type, and market demand.

      2. Land Preparation:

Prepare the land by removing weeds, tilling, and ensuring proper drainage for optimal groundnut growth.

     3. Seed Selection and Sowing:

Select high-quality seeds from reputable sources. Sow the seeds at the right depth and spacing, typically in rows.

    4. Irrigation and Nutrient Management:

Provide adequate water to the groundnut plants through regular irrigation. Monitor soil fertility and apply appropriate fertilizers to ensure healthy growth.

    5. Pest and Disease Control:

Implement pest and disease management strategies, such as using organic or chemical pesticides, to protect the groundnut crop from common threats like aphids, leaf spots, or fungal infections.

    6. Harvesting:

Harvest groundnuts when the leaves turn yellow and the pods mature. Lift the plants, shake off excess soil, and dry them in the sun or with appropriate equipment.

    7. Post-Harvest Handling:

Remove any damaged or diseased pods, and store the groundnuts in well-ventilated containers to prevent spoilage. Proper drying and storage conditions are crucial to maintain quality.

Groundnut Marketing:

  1. Sorting and Grading:

Sort groundnuts based on size, quality, and appearance. Grade them according to industry standards to ensure uniformity and market competitiveness.

     2. Packaging:

Package groundnuts in suitable containers, such as bags or jute sacks, that protect the produce from damage during transportation and storage. Label the packages with relevant information like the variety, grade, and producer details.

     3. Market Research:

Conduct market research to identify potential buyers, their preferences, and current market trends. This knowledge will help you position your product effectively.

     4. Pricing:

Set competitive prices for your groundnuts based on factors like quality, market demand, production costs, and competitor prices. Consider the costs incurred during cultivation, harvesting, processing, and packaging.

     5. Distribution and Sales Channels:

Establish distribution networks to reach various market segments, including wholesalers, retailers, and consumers. Explore options such as selling directly to local markets, supplying to supermarkets, or engaging with processors and manufacturers.

     6. Promotion and Advertising:

Develop marketing strategies to create awareness about your groundnut products. Utilize online platforms, local advertisements, product demonstrations, and participation in trade fairs or exhibitions to showcase your offerings.

     7. Building Relationships:

Develop strong relationships with buyers, processors, and other stakeholders in the groundnut industry. Maintain open communication, fulfill orders promptly, and ensure consistent product quality to foster long-term partnerships.

     8. Value Addition:

Consider adding value to your groundnut products by processing them into various forms like roasted nuts, groundnut butter, or oil. This can increase their market appeal and profitability. Remember to comply with any legal and regulatory requirements related to farming practices, quality standards, packaging, labeling, and food safety. It’s essential to adapt your marketing strategies based on your target market, local conditions, and available resources. Continuous learning, networking, and staying updated on market trends will contribute to the success of your groundnut farming and marketing endeavors.

Duck farming, also known as duck rearing or duck raising, refers to the practice of raising ducks for various purposes, such as meat, eggs, feathers, or as pets. Duck farming can be found in both small-scale backyard operations and large commercial farms.

Here are some key aspects of duck farming:

  1. Breeds:

There are numerous duck breeds suitable for farming, each with its own characteristics and suitability for different purposes. Common duck breeds raised for meat include Pekin ducks and Muscovy ducks, while Khaki Campbell ducks are popular for egg production.

      2. Housing and facilities:

Ducks can be housed in various types of housing, ranging from simple sheds or pens to more elaborate structures. Access to clean water for swimming and drinking is essential, as ducks have a natural affinity for water. Adequate ventilation, lighting, and protection from predators are also important considerations.

     3. Feeding:

Ducks are omnivorous and have a diverse diet. They consume a combination of commercial duck feed, grains, seeds, insects, worms, and aquatic vegetation. A balanced diet is necessary to ensure optimal growth, egg production, or meat quality.

    4. Health and care:

Proper care and management are crucial for maintaining the health and well-being of ducks. Regular monitoring of their health, vaccination against common diseases, and timely treatment of any illnesses or injuries are important aspects of duck farming.

    5. Egg production:

For those focusing on duck egg production, it’s essential to provide suitable nesting areas or boxes for the ducks to lay their eggs. Regular collection of eggs helps maintain cleanliness and prevents damage or spoilage.

   6. Meat production:

Ducks raised for meat require appropriate feeding, management, and growth monitoring. They are usually harvested at a specific age or weight to achieve the desired meat quality.

    7. Marketing and sales:

Duck products, such as meat and eggs, can be sold directly to consumers, restaurants, or processed for further value-added products. Establishing market connections and understanding consumer preferences are essential for successful duck farming ventures. It’s worth noting that local regulations, cultural practices, and market demand can vary across regions and countries, influencing the specific methods and approaches to duck farming. Therefore, it is important to research and understand the specific requirements and considerations applicable to the location where duck farming is being practiced.

Biofertilizers are substances that contain living microorganisms, such as bacteria, fungi, or algae, which enhance the nutrient availability and uptake of plants. They are used in agriculture to improve soil fertility, promote plant growth, and reduce the reliance on chemical fertilizers.

Biofertilizers offer several advantages in agricultural practices:

1. Nitrogen fixation:

Some biofertilizers, like nitrogen-fixing bacteria, have the ability to convert atmospheric nitrogen into a form that plants can utilize. This helps in reducing the need for synthetic nitrogen fertilizers, which are energy-intensive to produce and can have negative environmental impacts.

2. Phosphorus solubilization:

Certain microorganisms have the capacity to solubilize phosphorus, making it more accessible to plants. This is particularly beneficial in soils with low phosphorus availability, enhancing plant growth and development.

 3. Disease suppression:

Some biofertilizers contain beneficial microorganisms that can antagonize plant pathogens and suppress diseases. They help in maintaining healthy soil conditions and reducing the need for chemical pesticides.

4. Enhanced nutrient uptake:

Biofertilizers can improve the nutrient uptake efficiency of plants by increasing the availability of nutrients in the soil or by stimulating root development and nutrient absorption.

5. Soil health improvement:

Biofertilizers contribute to improving soil structure, organic matter content, and microbial diversity, which are all vital for long-term soil health and sustainability.

Common types of biofertilizers include:

  • Nitrogen-fixing bacteria:

These bacteria, such as Rhizobium, Azotobacter, and Azospirillum, form a symbiotic relationship with leguminous plants, enabling them to fix atmospheric nitrogen.

  • Phosphorus-solubilizing bacteria:

These bacteria, like Bacillus and Pseudomonas species, solubilize insoluble phosphorus compounds, making it more available to plants.

  • Plant growth-promoting rhizobacteria (PGPR):

These bacteria enhance plant growth by various mechanisms such as nutrient solubilization, production of growth-promoting substances, and disease suppression.

  • Mycorrhizal fungi:

These fungi form a mutualistic association with plant roots, extending their reach in the soil and facilitating nutrient uptake, particularly phosphorus.

  • Blue-green algae (cyanobacteria):

As mentioned earlier, certain cyanobacteria can fix atmospheric nitrogen and are associated with nitrogen-fixing plants like Azolla. Biofertilizers are typically applied to agricultural fields through seed inoculation, soil incorporation, or foliar sprays. Their use promotes sustainable farming practices by reducing chemical inputs, improving soil health, and minimizing environmental impacts. However, it’s important to note that the efficacy of biofertilizers can vary depending on specific crop requirements, soil conditions, and environmental factors. Therefore, proper selection and application of biofertilizers should be done based on thorough analysis and understanding of the target crop and agricultural system.

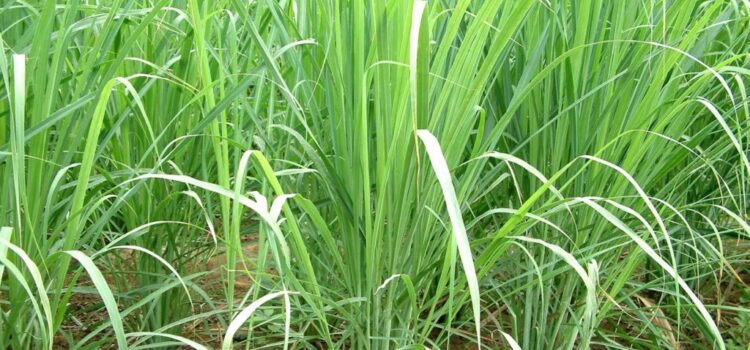
Lemon grass can be a profitable business if managed properly and if there is sufficient demand for its products. Lemon grass farming and marketing involve several key considerations. Here’s an overview of the steps involved in lemon grass farming and some marketing strategies:

  1. Farming: 

           a. Site selection: Choose a suitable location for lemon grass farming. Lemon grass thrives in warm climates                   and requires well-drained soil with good sunlight exposure

          b. Cultivation: Obtain lemon grass seeds or saplings from reputable sources. Prepare the land by removing weeds and tilling the soil. Plant the lemon grass at the recommended spacing and provide adequate irrigation.

         c. Maintenance: Regularly water the plants and manage weeds to ensure optimal growth. Fertilize as per the specific requirements of lemon grass. Monitor for pests and diseases and take necessary measures for pest control.

        d. Harvesting: Lemon grass is typically ready for harvest when the stalks are around 1 cm thick. Harvest by cutting the stalks close to the ground. It’s important to handle the harvested lemon grass carefully to prevent damage.

  1. Processing and Value Addition:

            a. Essential oils: Distilling lemon grass can yield essential oils, which are widely used in aromatherapy, skincare products, and perfumes. Explore the process of steam distillation or cold pressing to extract the oil.

           b. Culinary products: Lemon grass is popular in various cuisines. Consider drying the leaves and stalks for use as a culinary ingredient, such as in teas, spice blends, or flavorings.

         c. Packaging:  Package the processed lemon grass products attractively, ensuring proper labeling and information about the product. Use high-quality packaging materials to maintain the product’s freshness and aroma.

  1. Marketing: 

a. Identify target markets: Determine your target customers for lemon grass products. This could include retail consumers, restaurants, tea shops, health stores, or cosmetic manufacturers. Understand their preferences and requirements.

        b. Branding: Develop a unique brand identity for your lemongrass products. Create a compelling brand name, logo, and packaging design that reflects the quality and benefits of your products.

       c. Online presence: Establish an online presence through a website or social media platforms. Showcase your products, share relevant content, and engage with your audience. Consider e-commerce options for direct sales to customers.

      d. Local sales channels: Explore opportunities to sell your products through local stores, farmer’s markets, or food cooperatives. Build relationships with potential buyers and distributors who align with your target market.

      e. Collaboration: Partner with local businesses or wellness centers that value natural products. Collaborate on joint marketing efforts or create product bundles to expand your reach and leverage existing customer bases.

     f. Education and awareness: Educate consumers about the health benefits and versatile uses of lemongrass. Share recipes, DIY tips, or informational content through blog posts, videos, or workshops to create awareness and build trust.

     g. Product differentiation: Highlight the unique selling points of your lemongrass products. Emphasize factors such as organic farming practices, sustainability, or superior quality to differentiate yourself from competitors.

     h. Customer feedback and reviews: Encourage customers to provide feedback and reviews for your products. Positive testimonials can boost your brand’s reputation and attract new customers. Remember to adapt your marketing strategies based on market trends and customer feedback. Stay informed about emerging uses of lemon grass and leverage them to stay ahead in the market. Building strong relationships with customers and continuously improving the quality of your products will contribute to the long-term success of your lemongrass farming and marketing efforts.

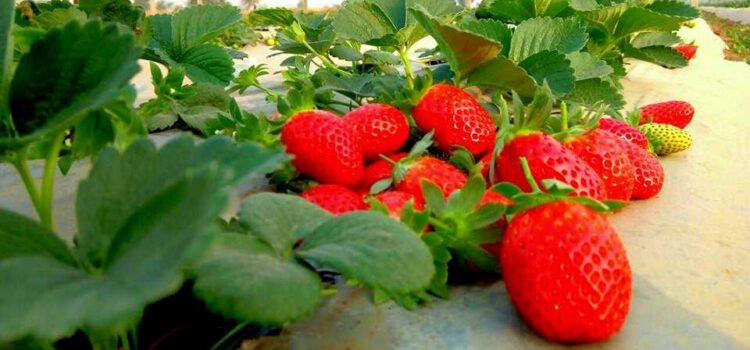
Strawberry is a popular fruit known for its sweet and tangy flavor. In India, strawberry farming has gained attention due to the increasing demand for this fruit and its suitability to specific agro-climatic conditions. Here’s some information about strawberries and their farming in India:

1. Climate and regions:

Strawberry cultivation in India is mainly concentrated in regions with cool temperatures and suitable growing conditions. States like Maharashtra (especially the Mahabaleshwar region), Himachal Pradesh, Jammu and Kashmir, Uttarakhand, Punjab, and parts of Haryana are known for successful strawberry farming. These regions offer the required cool climate, moderate sunlight, and well-drained soil.

2. Varieties:

Several strawberry varieties are cultivated in India, including Chandler, Sweet Charlie, Camarosa, Festival, and Selva. These varieties have been selected for their adaptability to Indian climatic conditions and their ability to produce good-quality fruits.

3. Soil and site selection:

Strawberries thrive in well-drained soils rich in organic matter. The soil should have good water-holding capacity while allowing excess water to drain away. Raised beds are often created to improve drainage and prevent waterlogging. The site selection should consider factors such as sunlight exposure and protection from strong winds.

4. Propagation and planting:

Strawberry plants are typically propagated through runners or tissue culture. Bare-root runners or tissue-cultured plantlets are planted in raised beds or containers. Planting is usually done in late summer or early autumn to allow the plants to establish before winter. Proper spacing between plants is essential to ensure adequate airflow and minimize the risk of disease.

5. Irrigation and nutrient management:

Strawberry plants have shallow root systems, and they require regular irrigation to maintain moisture levels. Drip irrigation systems are commonly used to provide a consistent water supply while reducing water wastage. Nutrient management involves the application of organic fertilizers and balanced doses of essential nutrients to support healthy growth and fruit production.

6. Pest and disease management:

Common pests affecting strawberry plants in India include aphids, red spider mites, and fruit flies. Regular monitoring, early detection, and appropriate pest control measures are essential to minimize damage. Diseases such as powdery mildew, gray mold, and crown rot can also affect strawberry plants. Integrated pest management (IPM) practices and the use of organic fungicides can help control these issues.

7. Harvesting and marketing:

Strawberries are typically harvested when fully mature and have developed their characteristic red color. Harvesting time varies depending on the variety and climatic conditions. Proper handling and packaging are crucial to maintain fruit quality. Marketing opportunities include selling fresh strawberries, processing them into jams, jellies, or desserts, and supplying to local markets or restaurants.

Strawberry farming in India offers economic potential for farmers, particularly in regions where the crop thrives. However, it requires careful planning, knowledge of cultivation techniques, pest and disease management, and access to suitable markets. Consulting with local agricultural experts or horticulture departments can provide valuable guidance for successful strawberry farming.


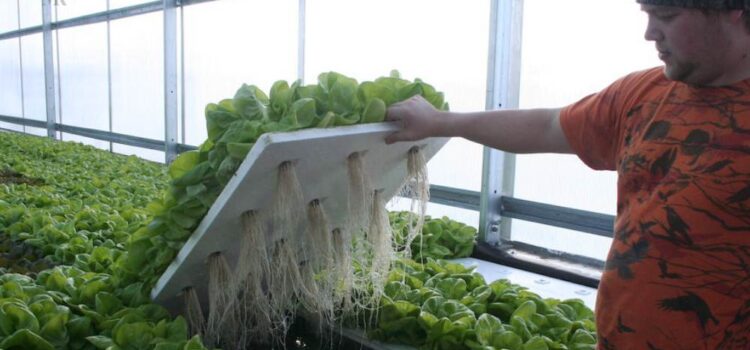
Hydroponics farming is a soil-less cultivation method that involves growing plants in a nutrient-rich water solution instead of traditional soil-based methods. In hydroponics, plants receive all the essential nutrients they need directly from the water, which is carefully balanced to meet their requirements.

The key components of hydroponics farming include:

1. Growing medium:

Instead of soil, hydroponic systems use a neutral growing medium to support plant roots. Common examples include perlite, vermiculite, coconut coir, and rockwool. The growing medium provides stability to the plants while allowing roots to access water and nutrients.

2. Nutrient solution:

The nutrient solution is a mixture of water and mineral nutrients necessary for plant growth. It typically contains a balanced blend of macronutrients (nitrogen, phosphorus, potassium) and micronutrients (iron, manganese, zinc, etc.). The solution is carefully monitored and adjusted to maintain optimal nutrient levels.

3. Water and oxygen supply:

Hydroponics systems circulate the nutrient solution, ensuring a constant supply of water and nutrients to the plant roots. Adequate oxygenation is also crucial for root health, achieved through techniques such as aeroponics or the use of air stones.

4. pH and EC control:

pH refers to the acidity or alkalinity of the nutrient solution, while EC (electrical conductivity) measures its nutrient concentration. Maintaining the appropriate pH level (typically between 5.5 and 6.5) and EC value ensures optimal nutrient uptake by the plants.

There are different types of hydroponic systems, including:

  • Deep water culture (DWC):

Plants are suspended in the nutrient solution, with the roots submerged and continuously oxygenated.

  • Nutrient film technique (NFT):

A thin film of nutrient solution flows over the roots, allowing them to absorb nutrients while being exposed to air.

  • Ebb and flow (flood and drain):

Plants are periodically flooded with the nutrient solution and then drained to provide aeration.

  • Drip irrigation:

The nutrient solution is delivered to the plants through drip emitters, providing a controlled and precise supply.

Benefits of hydroponics farming include:

1. Water efficiency:

Hydroponics systems use significantly less water compared to traditional soil-based agriculture, as water is recirculated in closed systems. This makes it particularly suitable for regions with water scarcity.

2. Nutrient control:

Hydroponics allows precise control over nutrient levels, ensuring plants receive optimal nutrition for maximum growth and yield. It eliminates the risk of nutrient imbalances or deficiencies.

3. Space efficiency:

Hydroponics systems can be designed vertically or in compact setups, enabling high-density cultivation in limited spaces. This makes it suitable for urban farming and maximizing land utilization.

4. Reduced reliance on pesticides:

Hydroponics reduces the risk of soil-borne pests and diseases, leading to a decreased need for chemical pesticides.

5. Year-round cultivation:

Hydroponics systems can be operated indoors or in controlled environments, allowing year-round production regardless of external climate conditions. Hydroponics farming has gained popularity due to its efficient resource utilization, high yields, and potential for sustainable agriculture. It is used for various crops, including leafy greens, herbs, strawberries, tomatoes, and cucumbers.

Future of Hydroponics

The future of hydroponics looks promising and is expected to play a significant role in sustainable agriculture and food production. Here are a few potential developments and trends that could shape the future of hydroponics:

1. Advancements in technology:

As technology continues to evolve, we can expect to see more sophisticated and automated hydroponic systems. This could include the integration of sensors, artificial intelligence, and robotics to monitor and optimize plant growth, nutrient delivery, and environmental conditions. Smart systems may be able to adjust lighting, temperature, humidity, and nutrient levels based on real-time data, resulting in even higher yields and resource efficiency.

2. Vertical farming:

Vertical farming, which involves growing plants in vertically stacked layers or structures, is gaining momentum in urban areas with limited space. Hydroponics is particularly well-suited for vertical farming as it allows for efficient use of space and resources. In the future, we may see more vertical farms integrated into buildings and urban environments, providing locally grown produce and reducing the carbon footprint associated with transportation.

3. Integration of renewable energy:

To enhance sustainability, hydroponic systems could increasingly rely on renewable energy sources such as solar power or wind energy. Integrating renewable energy can reduce the environmental impact of hydroponics and make it even more sustainable and cost-effective.

4. Customized nutrient formulations:

Research into plant nutrition and the specific nutrient requirements of different crops is ongoing. In the future, we may see the development of customized nutrient formulations tailored to specific plant varieties and growth stages. This could result in improved plant health, increased nutrient uptake efficiency, and optimized crop yields.

5. Integration with other agricultural practices:

Hydroponics can be combined with other agricultural practices such as aquaponics, where fish waste provides nutrients for plants, creating a symbiotic relationship. Such integrated systems can further enhance resource utilization and create more sustainable and self-sufficient food production systems.

6. Expansion in controlled environment agriculture:

Controlled environment agriculture, including hydroponics, is gaining attention as a means to produce food in regions with unfavorable climates or limited arable land. As the global population continues to grow, controlled environment agriculture can help ensure a consistent and reliable food supply, irrespective of external weather conditions or geographic limitations.

Overall, the future of hydroponics holds great potential for increased efficiency, sustainability, and food production. Continued research, technological advancements, and innovative approaches will likely drive the adoption and development of hydroponic systems in the years to come.

Vermicompost is a type of compost that is produced through the process of vermicomposting. Vermicomposting is the practice of using earthworms to break down organic waste materials, such as kitchen scraps, yard waste, and agricultural residues, into a nutrient-rich soil amendment.

What is the Vermicompost, how to Prepare and its Soil Health Benefits for Rise the Grain Yield

The process involves creating a controlled environment, typically using a composting bin or worm bin, where the earthworms are introduced along with the organic waste. The earthworms consume the organic material and break it down through digestion. As they pass the material through their bodies, it undergoes a transformation and is enriched with beneficial microorganisms and nutrients.

The resulting vermicompost, also known as worm castings or worm humus, is a dark, crumbly substance that is highly valuable as a soil conditioner and fertilizer. It is rich in essential nutrients like nitrogen, phosphorus, and potassium, as well as beneficial bacteria and other microorganisms that contribute to soil health.

Vermicompost can be used in various gardening and agricultural applications. It improves soil structure, enhances moisture retention, increases nutrient availability, and promotes healthy plant growth. It is often mixed into potting mixes, added to garden beds, or used as a top dressing around plants. Vermicomposting is considered an environmentally friendly practice as it helps divert organic waste from landfills, reduces greenhouse gas emissions, and provides a sustainable source of nutrient-rich compost.

To make vermicompost, follow these steps:

  1. Choose a suitable container:

Select a container for your vermicomposting system. It can be a compost bin, wooden crate, or even a large plastic container with drainage holes at the bottom. Ensure that the container is well-ventilated.

      2. Create bedding material:

Prepare bedding material for the worms. Shredded newspaper, cardboard, coconut coir, or a mixture of these materials work well. Moisten the bedding material until it becomes damp, but not soggy.

     3. Add organic waste:

Start by adding a layer of organic waste on top of the bedding. This can include fruit and vegetable scraps, coffee grounds, tea bags, crushed eggshells, and other non-animal food waste. Avoid adding meat, dairy products, oily foods, and pet waste as they can attract pests or cause odor issues.

     4. Introduce the worms:

Purchase composting worms, such as red worms (Eisenia fetida) or red wigglers, from a reputable source. Place the worms on top of the organic waste layer. Start with a small number of worms, and as they multiply, you can add more.

     5. Maintain the system:

Cover the container with a breathable lid or a layer of damp burlap to create a dark and moist environment. Keep the vermicomposting system in a cool, shaded area, as worms prefer temperatures between 55-77°F (13-25°C). Ensure that the bedding remains moist but not waterlogged. If it becomes too dry, mist it with water.

    6. Feed the worms:

Regularly add organic waste to the bin, burying it under the bedding. You can create shallow depressions in the bedding and add the waste there. Avoid overfeeding the worms; they typically consume half their weight in food per day.

     7. Maintain a balance:

To maintain a healthy vermicomposting system, aim for a balanced ratio of organic waste and bedding. If the bin becomes too acidic or starts to smell, add more bedding material such as shredded paper or crushed eggshells.

     8. Harvest the vermicompost:

After several months, the bedding and organic waste will transform into dark, crumbly vermicompost. To harvest it, move all the contents of the bin to one side. Add fresh bedding and food to the empty side. Over time, the worms will migrate to the new side, allowing you to collect the vermicompost from the other side.

    9. Use the vermicompost:

The harvested vermicompost can be used as a soil amendment or fertilizer in your garden or potted plants. Mix it into potting mixes, spread it around plants, or create a vermicompost tea by steeping it in water and using the liquid as a nutrient-rich plant fertilizer. remember to regularly maintain and monitor your vermicomposting system, adjusting the moisture and food levels as needed. With time and proper care, you’ll have a steady supply of nutrient-rich vermicompost for your plants while reducing organic waste.


Key roles and benefits of vermicompost in soil and its impact on grain yields:

Vermicompost plays a vital role in soil health and fertility. Here are some of the key roles and benefits of vermicompost in soil:

  1. Nutrient enrichment:

Vermicompost is rich in essential plant nutrients, including nitrogen, phosphorus, potassium, calcium, and micronutrients. When added to soil, it releases these nutrients slowly, providing a sustained supply of plant-available nutrition. This helps improve nutrient levels in the soil, ensuring healthy plant growth and development.

    2. Soil structure improvement:

Vermicompost enhances soil structure by improving its texture, porosity, and water-holding capacity. The organic matter in vermicompost acts as a binding agent, helping to form stable aggregates in the soil. This promotes better root penetration, aeration, and drainage, creating an optimal environment for plant roots to access air, water, and nutrients.

    3. Water retention and drainage:

The improved soil structure resulting from vermicompost application allows the soil to retain moisture more effectively. Vermicompost acts as a sponge, absorbing and holding water, which can then be slowly released to plant roots. This helps prevent waterlogging and enhances drought resistance. Additionally, vermicompost improves soil drainage, preventing excess water from causing soil erosion or root rot.

    4. Microbial activity promotion:

Vermicompost is teeming with beneficial microorganisms, including bacteria, fungi, and other beneficial soil microbes. These microorganisms contribute to the soil’s microbial diversity and activity, aiding in the breakdown of organic matter and nutrient cycling. They also help suppress harmful pathogens, promoting a healthy soil ecosystem.

    5. pH regulation:

Vermicompost has a neutralizing effect on soil pH, helping to regulate it towards a more neutral range. It can buffer soil acidity or alkalinity, creating a favorable pH for plant growth. This is particularly beneficial in acidic soils, as vermicompost can help raise the pH, making it more suitable for a wider range of plants.

   6. Disease and pest resistance:

The presence of beneficial microorganisms and the overall improvement in soil health through vermicompost application can enhance the natural defense mechanisms of plants. Strong, healthy plants are more resistant to diseases and pests, reducing the need for chemical interventions.

   7. Environmental sustainability:

Using vermicompost as a soil amendment is an environmentally sustainable practice. It helps divert organic waste from landfills, reducing greenhouse gas emissions and promoting recycling. Additionally, by improving soil health, vermicompost contributes to sustainable agriculture and promotes long-term soil fertility.

In summary, vermicompost improves soil fertility, structure, water-holding capacity, and nutrient availability. It fosters beneficial microbial activity, regulates pH, and promotes disease resistance, ultimately supporting healthy plant growth and sustainable soil management practices. it is important to note that the impact of vermicompost on grain yields may vary depending on factors such as crop type, soil conditions, climate, application rates, and management practices.

It is recommended to conduct local trials and adapt the application of vermicompost to suit specific agricultural systems and crop requirements. Consulting with agricultural experts or extension services can provide valuable guidance on the appropriate use of vermicompost for maximizing grain yields in a specific context.

How to Start Sericulture Business and Get High Earning, Complete Knowledge

Sericulture is the practice of rearing silkworms for the production of silk. It involves the cultivation of mulberry trees, the primary food source for silkworms, and the subsequent rearing of silkworms to obtain silk cocoons. The cocoons are then processed to extract silk fibers, which are used to create various silk products such as fabric, garments, and textiles.

to engage in sericulture in India, here are the steps involved in setting up and managing a sericulture farm:

1. Land selection:

Choose a suitable piece of land for sericulture, preferably with good soil fertility and access to water sources. The land should have enough space for mulberry cultivation and silkworm rearing.

2. Mulberry cultivation:

Start by cultivating mulberry trees, which are the primary food source for silkworms. Mulberry varieties like S-146, S-1635, and V-1 are commonly grown in India. Prepare the land by plowing and leveling, and then plant mulberry saplings in rows or beds. Maintain the mulberry plants by providing proper irrigation, fertilization, and pest control.

3. Silkworm rearing:

Once the mulberry plants are established, you can start rearing silkworms. Obtain silkworm eggs or larvae from a reliable source. Provide suitable rearing conditions, including temperature and humidity control, proper ventilation, and cleanliness. Feed the silkworms with fresh mulberry leaves, ensuring a continuous supply of leaves as per their growth stage. Monitor the silkworms’ health, protect them from diseases and pests, and ensure a conducive environment for cocoon formation.

4. Cocoon harvesting:

After about 25-30 days, the silkworms will spin cocoons. Harvest the cocoons carefully, ensuring minimum damage. Cocoons are usually harvested by gently boiling them in water to facilitate the extraction of silk threads.

5. Silk extraction:

Extract silk threads from the cocoons through a process called reeling. The cocoons are immersed in hot water to loosen the silk filaments. The silk filaments are then reeled onto a spindle to form a continuous thread. This process requires skill and can be done manually or using automated reeling machines.

6. Silk processing:

After reeling, the silk threads go through processes like twisting, dyeing, and weaving to create silk fabric. Silk processing techniques may vary depending on the intended end product, such as silk sarees, garments, or silk yarn for weaving.

7. Marketing and sales:

Identify potential markets for your silk products. You can sell directly to customers, through wholesalers, or participate in exhibitions and trade fairs. Establishing partnerships with textile manufacturers, exporters, or online platforms can help expand your reach.

It is important to note that sericulture practices and requirements may vary across different states in India. It is advisable to consult local agricultural departments or sericulture development agencies for specific guidelines, training programs, and financial assistance schemes available in your region.

Complete Knowledge of Natural Farming

Natural farming involves a range of practices and techniques that can be adapted to specific farming systems and local conditions. While the exact approach may vary, here are some general steps and principles to consider when practicing Complete Knowledge of Natural Farming:

1. Understand your local ecosystem:

Familiarize yourself with the natural environment, climate, soil types, and local plant and animal species in your area. This understanding will help you make informed decisions about crop selection and management.

2. Enhance soil fertility:

Focus on building and maintaining healthy soil. Use organic matter like compost, animal manure, and plant residues to enrich the soil with nutrients and improve its structure. Consider incorporating cover crops and green manure to add organic material and prevent soil erosion.

3. Minimize chemical inputs:

Avoid the use of synthetic fertilizers, pesticides, and herbicides. Instead, utilize natural alternatives such as biofertilizers, beneficial insects, and companion planting techniques to manage pests and diseases. Implement crop rotation to disrupt pest and disease cycles.

4. Preserve biodiversity:

Encourage a diverse range of plants and animals on your farm. Plant a variety of crops, including native and traditional varieties, to promote biodiversity and provide habitats for beneficial insects, birds, and other organisms. Avoid monocropping, which can lead to imbalances in the ecosystem.

5. Implement minimal tillage:

Minimize soil disturbance by reducing or eliminating tillage. Excessive tillage can disrupt the soil structure, deplete organic matter, and contribute to erosion. Use techniques like no-till farming, conservation tillage, or shallow tillage to preserve soil health and structure.

6. Practice water conservation:

Manage water efficiently by implementing methods such as mulching, drip irrigation, and water recycling. Mulching helps retain soil moisture, reduces weed growth, and prevents erosion. Drip irrigation targets water directly to plant roots, minimizing water wastage.

7. Observe and adapt:

Regularly observe your farm’s ecosystem and adapt your practices accordingly. Monitor the health of your crops, the presence of pests and diseases, and the overall condition of the soil. Use this information to make informed decisions and adjust your natural farming techniques as needed.

8. Promote self-sufficiency:

Strive for self-sufficiency by utilizing on-farm resources. Save seeds from your crops, produce compost from organic waste, and rear livestock for manure and other inputs. This reduces dependency on external inputs and creates a closed-loop system.

9. Continuous learning and improvement:

Natural farming is a continuous learning process. Stay informed about new techniques, research, and best practices in natural farming. Attend workshops, and conferences and engage with other farmers practicing natural farming to share experiences and knowledge.

Remember, the specific practices and techniques employed in natural farming can vary depending on factors such as climate, soil conditions, and crop types. It’s important to adapt these general principles to suit your specific farming context and seek guidance from experienced farmers or agricultural experts in your region.