Gardener/Udhaan Sevak Training Program

We have the trust of more than 10000 trainers (Students, Researchers, Scientist, Academicians, Entrepreneurs & Professionals) since last 10 years in the field of Agriculture, Horticulture, Fisheries & Animal Husbandry.

Since we ensure to all of you that our certificate will be 100% Genuine.

Google form link

👉 https://forms.gle/4oSS8UgdLP12mndF6 

Gardener WhatsApp group: https://chat.whatsapp.com/EvUb4GGhfV4DRWXqhj7SBr
Email: agriculture24mag@gmail.com
Calling & Whatsapp No: +91 6394082801

Bank Account Details:
Name of Account: Agro Environmental Development Society
Name of Bank: State Bank of India
Account Number: 37836254237
IFSC Code: SBIN0018205
Bank Address: SBI, Saifni Shahabad, Bilari Road, Saifni, Rampur-244922, UP

Removal of Weeds from Paddy Crops

Paddy is a term commonly used to refer to the rice plant (Oryza sativa) and its crop. Rice is one of the most important staple foods worldwide, providing a significant portion of the caloric intake for billions of people. It’s a cereal grain that is widely cultivated in various regions, particularly in Asia. Chemical weed control in paddy (rice) crops involves the use of herbicides to manage and eliminate unwanted weeds that compete with the rice plants for nutrients, water, and sunlight. Here are some commonly used herbicides for weed control in paddy crops:

1. Pre-Emergence Herbicides:

    • Pendimethalin: It is a widely used pre-emergence herbicide. It prevents the germination of weed seeds and controls annual grasses and some broadleaf weeds.
    • Butachlor: Another pre-emergence herbicide effective against grassy weeds. It needs to be incorporated into the soil.

2. Post-Emergence Herbicides:

    • 2,4-D (2,4-Dichlorophenoxyacetic acid): It is used to control broadleaf weeds and is often applied after the paddy has emerged.
    • Metsulfuron Methyl: This is effective against a range of broadleaf and sedges. It’s a systemic herbicide that is absorbed by the weeds and translocated throughout the plant.
    • Bispyribac Sodium: This is often used to control grassy weeds in paddy fields. It’s systemic and provides both pre- and post-emergence control.
    • Glyphosate: While it’s not typically used in paddy fields directly due to its non-selective nature (it can harm rice plants as well), it might be used in situations where weeds are a major concern and rice hasn’t emerged yet. It’s important to note that the use of herbicides should be carried out with proper knowledge, following label instructions, and considering factors such as weed species, rice growth stage, and environmental conditions. Misuse or overuse of herbicides can have negative effects on both the crop and the environment.

3. Application of Herbicides in Paddy Crops:

  • Timing: Herbicides can be applied either before planting (pre-plant) or after the rice has emerged (post-emergence). The choice depends on the specific herbicide, target weeds, and rice growth stage.
  • Spraying Method: Herbicides are usually applied using backpack sprayers, tractor-mounted sprayers, or aerial spraying in larger fields.
  • Dosage: The correct dosage specified on the herbicide label should be followed meticulously. Overdosing can harm the crop, while underdosing might not provide effective weed control.
  • Safety Precautions: It’s important to follow safety guidelines, wear appropriate protective clothing, and avoid herbicide drift onto non-target areas.

Health Benefits of Bitter Gourd Juice & Its Nutrients Value

Bitter gourd, also known as bitter melon or Momordica charantia, is a vegetable that has long been recognized for its potential health benefits, especially in traditional medicine systems like Ayurveda and Traditional Chinese Medicine. Bitter gourd juice, derived from the bitter gourd fruit, is often consumed for its various health-promoting properties. Here are some potential health benefits associated with bitter gourd juice:

1. Blood Sugar Regulation:

Bitter gourd is perhaps most well-known for its potential to help regulate blood sugar levels. It contains compounds like charantin and polypeptide-p, which have been studied for their anti-diabetic effects. Bitter gourd juice may help improve insulin sensitivity and reduce glucose absorption, leading to better blood sugar control.

2. Weight Management:

Bitter gourd is low in calories and carbohydrates, making it a suitable addition to weight management diets. It can help control appetite and reduce cravings due to its bitter taste, which can impact the way the body processes food.

3. Antioxidant Properties:

Bitter gourd is rich in antioxidants, including vitamin C, vitamin A, and various phytonutrients. Antioxidants help neutralize harmful free radicals in the body, which can protect cells from oxidative damage and reduce the risk of chronic diseases.

4. Immune System Support:

The vitamins and minerals in bitter gourd, such as vitamin C, contribute to a healthy immune system. A strong immune system is essential for defending the body against infections and illnesses.

5. Digestive Health:

Bitter compounds found in bitter gourd may stimulate the production of digestive enzymes, aiding in digestion. It can also promote gut health by supporting the growth of beneficial gut bacteria.

6. Skin Health:

The antioxidants and nutrients in bitter gourd may contribute to healthier skin by combating oxidative stress and promoting collagen production. Some people also use bitter gourd topically to address certain skin conditions.

7. Liver Health:

Bitter gourd may help support liver function by promoting detoxification and reducing oxidative stress on the liver cells.

  1. Anti-Inflammatory Effects: Bitter gourd contains compounds with potential anti-inflammatory properties, which can help reduce inflammation in the body and may be beneficial for conditions like arthritis.
  2. Heart Health: Some studies suggest that bitter gourd may have a positive impact on heart health by helping to lower cholesterol levels and reduce the risk of cardiovascular diseases.

Nutrients Value of Bitter Gourd Juice

The nutritional content of bitter gourd juice can vary based on factors such as the size of the fruit, its ripeness, and the preparation method. However, I can provide you with approximate values for some key nutrients found in bitter gourd juice per 100 grams:

Vitamin C: Around 35 mg

Vitamin A: About 471 IU

Folate (Vitamin B9): Approximately 72 µg

Potassium: Around 296 mg

Calcium: About 19 mg

Iron: Approximately 0.43 mg

Magnesium: Around 17 mg

Dietary Fiber: Approximately 2.8 g

Phosphorus: About 34 mg

Profitable Business of Bitter Gourd Cultivation in India, Varieties, Pest & Disease Management

Introduction:

Bitter gourd, also known as bitter melon or Momordica charantia, is a tropical and subtropical vine belonging to the gourd family, Cucurbitaceae. It is widely cultivated for its edible fruit, which is known for its extremely bitter taste. Bitter gourd is popular in many Asian cuisines and is valued not only for its distinctive flavour but also for its potential health benefits.

The fruit of the bitter gourd is oblong or oval in shape, with a rough, bumpy skin that ranges in colour from green to yellow-orange when ripe. The flesh inside is crunchy and watery, with a taste that is intensely bitter. Despite its bitterness, bitter gourd is used in various dishes, such as curries, stir-fries, and soups, often paired with other strong Flavors to balance out its taste. Bitter gourd is believed to have several health benefits, primarily due to its rich nutritional content and various bioactive compounds. It is a good source of vitamins (especially vitamin C), minerals (such as iron, magnesium, and potassium), and dietary fibre. Additionally, bitter gourd contains compounds like charantin, momordicin, and vicine, which have been studied for their potential to help regulate blood sugar levels and improve insulin sensitivity, making it of interest to individuals with diabetes.

It’s important to note that the bitterness of bitter gourd can be an acquired taste, and not everyone enjoys it. Some people appreciate its unique flavour and potential health benefits, while others find its bitterness challenging to tolerate. If you’re considering trying bitter gourd, it’s a good idea to explore various cooking methods and recipes to find a preparation that suits your taste preferences.

Bitter gourd, also known as bitter melon or karela, is a popular vegetable cultivated in India due to its nutritional and medicinal properties. It’s commonly used in various culinary dishes and traditional medicine.

Here are methods of bitter gourd cultivation in India:

1. Climate and Soil:

Bitter gourd thrives in warm and humid tropical climates. It requires temperatures between 24-30°C (75-86°F) for optimal growth. It’s sensitive to frost and grows best in well-draining, sandy-loam to clay-loam soils with a pH range of 6.0-6.7.

2. Varieties:

India has a rich diversity of bitter gourd varieties, each with its own unique characteristics and uses. Here are some popular Indian varieties of bitter gourd:

  • Indian Landrace (Local Varieties):

These are traditional and locally adapted varieties of bitter gourd that have been cultivated for generations. They often have a distinct regional preference and are well-suited to specific climates and soil conditions.

  • Arka Harit:

Developed by the Indian Institute of Horticultural Research (IIHR), Arka Harit is a high-yielding bitter gourd variety known for its smooth, green skin and moderate bitterness. It’s popular among farmers due to its resistance to certain pests and diseases.

  • Pusa Do Mausami:

Developed by the Indian Agricultural Research Institute (IARI), Pusa Do Mausami is a hybrid variety with a relatively uniform fruit size and shape. It’s known for its dark green color, tender fruit, and moderate bitterness.

  • Pusa Naveen:

Another hybrid developed by IARI, Pusa Naveen is favored for its uniformity, smooth skin, and good keeping quality. The fruit is long, cylindrical, and has a relatively mild bitterness.

  • COBH-1 (Coimbatore Bitter Gourd Hybrid-1):

Developed by the Tamil Nadu Agricultural University, this hybrid variety is known for its high yield potential and good resistance to pests and diseases. It produces uniform, dark green fruits with moderate bitterness.

  • CO-1 (Coimbatore-1):

This is a well-known traditional variety from Coimbatore, Tamil Nadu. It has a distinctive oblong shape and is known for its strong bitterness. It’s used in various regional dishes.

  • Priya:

Priya is a popular hybrid bitter gourd variety known for its high yield potential, uniform fruit size, and resistance to diseases. The fruits are relatively slender and dark green.

  • MDU-1 (Madurai Bitter Gourd-1):

Developed by the Agricultural College and Research Institute, Tamil Nadu, this variety is known for its high yield and dark green, glossy fruits. It has moderate bitterness.

  • Swarna:

Swarna is a hybrid variety with elongated, slender fruits. It is often used in traditional Indian cooking and is known for its moderate bitterness.

  • Preethi:

Preethi is a hybrid variety with long, cylindrical fruits. It is valued for its relatively mild bitterness and uniform fruit size.

  • Narendra Karela:

This variety is known for its resistance to pests and diseases. The fruits are dark green and slightly ridged.

3. Propagation:

Bitter gourd is primarily propagated through seeds. Seeds can be directly sown in the field or started in nursery beds and transplanted later. Transplanting allows for better control of plant spacing and growth.

4. Sowing and Transplanting Season of Bitter Gourd:

Seeds can be sown in nursery beds or seed trays about 4-6 weeks before the last frost. Transplanting should be done when seedlings have 3-4 true leaves. Space the plants about 1-2 meters apart in rows with proper trellising support.

Here are guidelines for sowing and transplanting bitter gourd in different parts of India:

  • North India:

In North India, bitter gourd is usually sown and transplanted from late February to early March, depending on the local climate. This allows the plants to establish themselves before the hotter months arrive. Transplanting can occur in late March to early April. Bitter gourd requires warm temperatures for optimal growth.

  • South India:

In South India, where the climate is relatively milder and warmer throughout the year, bitter gourd can be sown and transplanted from late January to early February. Transplanting can take place in late February to early March.

  • East India:

East India has a climate similar to North India. Bitter gourd can be sown and transplanted around the same time as in North India, from late February to early March. Transplanting can occur in late March to early April.

  • West India:

In West India, bitter gourd can also be sown and transplanted around the same time as in North India, from late February to early March. Transplanting can take place in late March to early April.

6. Trellising:

Bitter gourd is a vine-type plant, and providing vertical support helps in better fruit development, disease management, and easy harvesting. Bamboo or wooden stakes can be used for trellising.

7. Fertilization & Manuring:

The quantity of fertilizers and manure required for bitter gourd cultivation can vary based on factors such as soil fertility, nutrient content, and local growing conditions. It’s important to conduct a soil test before applying fertilizers to determine the specific nutrient requirements of your soil. However, here are some general guidelines for fertilization and manure application for bitter gourd cultivation:

  • Organic Manure:

Before planting, incorporate well-rotted organic manure into the soil. This can include compost, well-rotted cow dung, or any other locally available organic material. Apply about 10-15 tons of organic manure per hectare (4-6 tons per acre). Mix the organic matter thoroughly into the soil to improve soil structure and fertility.

  • Nitrogen (N):

Bitter gourd plants require nitrogen for healthy foliage growth and fruit development. The nitrogen requirement can vary, but as a general guideline, you can apply about 50-60 kg of nitrogen per hectare (20-24 kg per acre) in multiple split doses during the growing season.

  • Phosphorus (P) and Potassium (K):

Phosphorus and potassium are important for root development, flower formation, and overall plant health. Apply about 40-50 kg of phosphorus and 40-50 kg of potassium per hectare (16-20 kg each per acre) before planting or during the early stages of growth.

  • Micronutrients:

Bitter gourd plants also benefit from micronutrients like zinc, iron, manganese, and copper. These are often included in balanced fertilizers or can be applied separately based on soil test recommendations.

  • Fertilizer Application Schedule:

Divide the total fertilizer quantity into multiple applications to ensure steady nutrient availability throughout the growing season. Apply a portion of the nitrogen, phosphorus, and potassium before planting or during transplanting, and then apply the remaining amounts in 2-3 subsequent doses during the vegetative growth and fruiting stages.

  • Foliar Feeding:

Foliar application of micronutrients can be beneficial, especially if there are signs of nutrient deficiencies. A balanced micronutrient spray can be applied as needed.

  • Soil pH Adjustment:

Ensure that the soil pH is within the optimal range of 6.0-6.7 for bitter gourd cultivation. If the pH is too high or too low, nutrient availability can be affected. Lime or sulfur can be added to adjust the pH as needed.

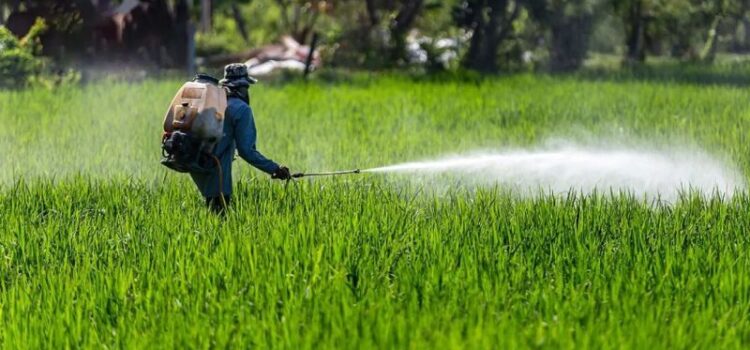
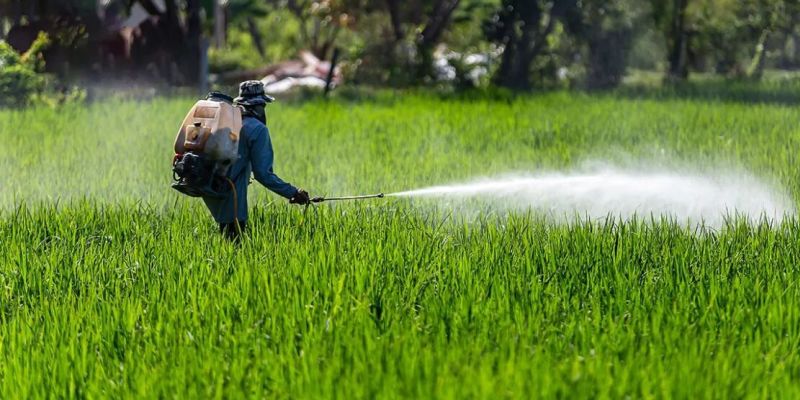
8. Pest and Disease Management:

Controlling pests and diseases in bitter gourd cultivation often requires a combination of cultural practices, biological controls, and, when necessary, the use of chemical pesticides. Here are some common pests and diseases of bitter gourd and the chemicals used for their control:

Pests:
  • Fruit Flies: Fruit flies are a major pest of bitter gourd, causing damage to fruits. They can be controlled using chemicals like neonicotinoids (e.g., imidacloprid) or pyrethroids (e.g., deltamethrin).
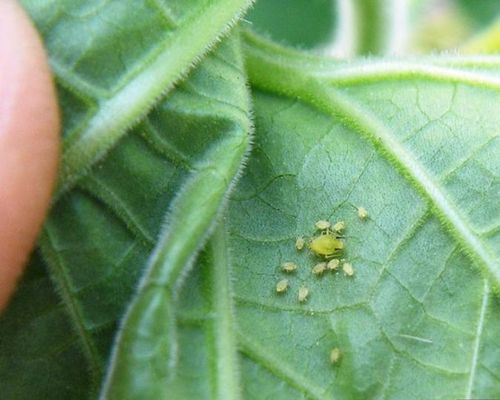
  • Aphids: Aphids are small insects that suck sap from plant tissues, causing distortion and stunting. Insecticidal soaps, neem oil, or pyrethroids can be used for aphid control.

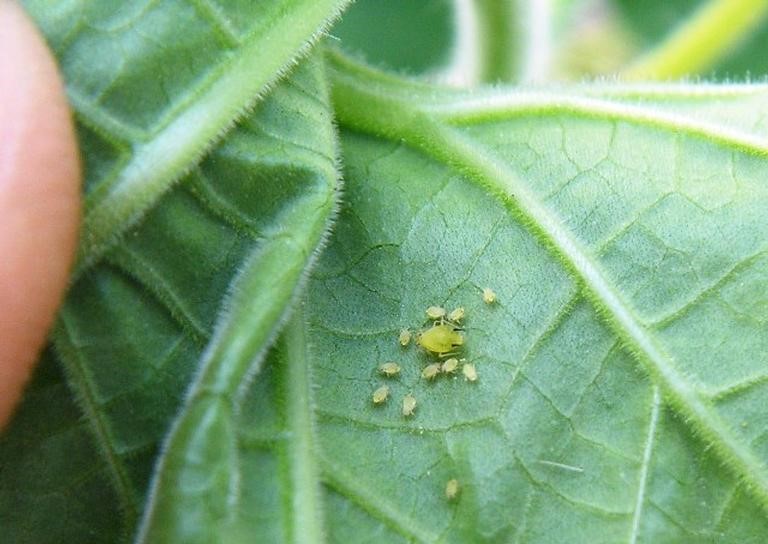
Fig: Aphid on leaf of Bitter Gourd

  • Whiteflies: Whiteflies are small insects that feed on plant sap and can transmit viruses. Neonicotinoids, pyrethroids, or insecticidal soaps are commonly used to manage whiteflies.
  • Spider Mites: Spider mites are tiny pests that feed on plant sap and cause stippling on leaves. Miticides like abamectin or horticultural oils can help control spider mite infestations.
Diseases:
  • Powdery Mildew: Powdery mildew appears as a white, powdery coating on leaves. Fungicides containing sulfur, potassium bicarbonate, or azoxystrobin can be used to control powdery mildew.
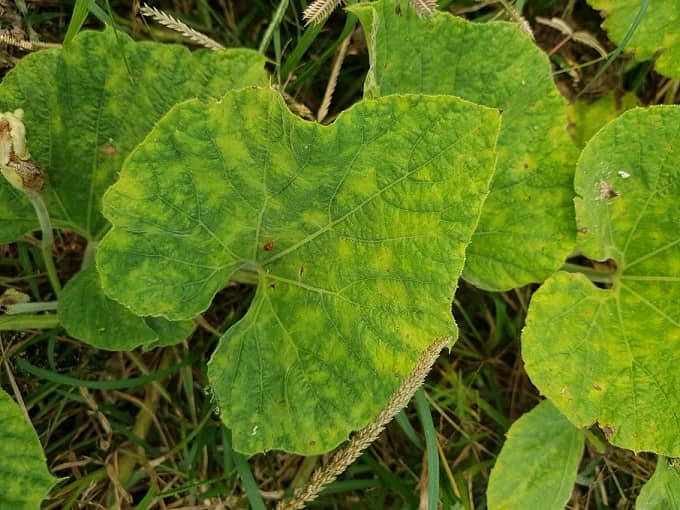
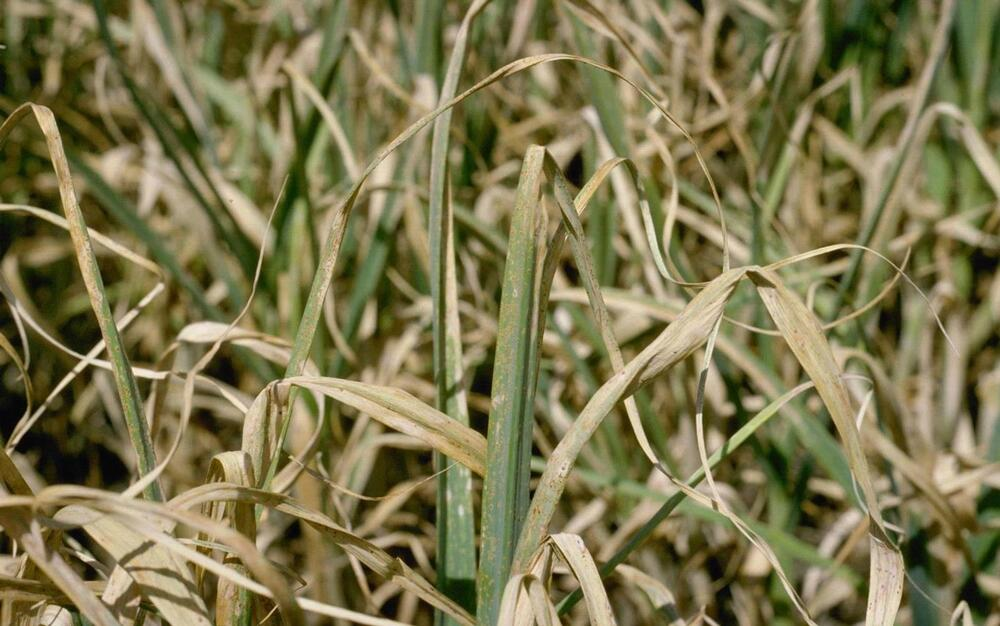
  • Downy Mildew: Downy mildew causes yellow spots on the upper surface of leaves and a downy growth on the underside. Fungicides like metalaxyl or mancozeb can be used for control.


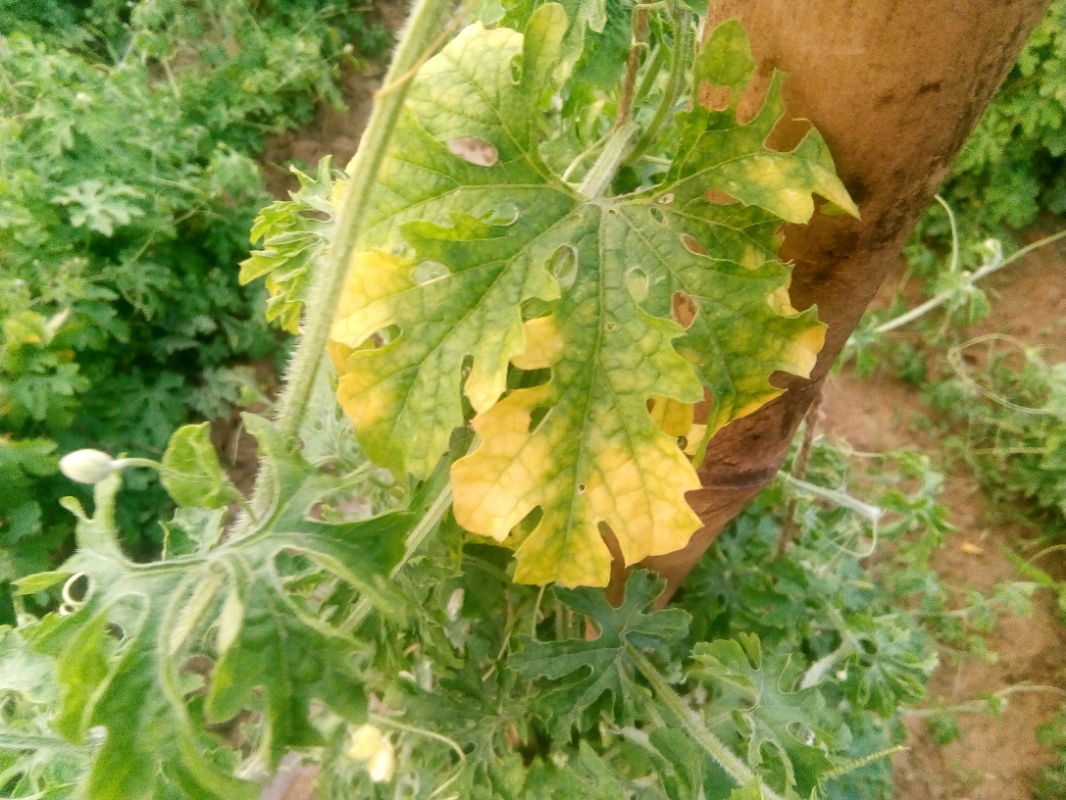
Fig: Effect of Downy Mildew Disease in Bitter Gourd


  • Anthracnose: Anthracnose leads to dark lesions on leaves, stems, and fruits. Copper-based fungicides can help manage anthracnose.
  • Fusarium Wilt: Fusarium wilt causes wilting, yellowing, and eventual death of the plant. Soil drenching with fungicides like carbendazim can be used for control.
  • Bacterial Wilt: Bacterial wilt results in wilting, yellowing, and bacterial ooze from cut stems. There are no effective chemical treatments for bacterial wilt. Practices like crop rotation and using disease-free seeds are important for prevention.

9. Harvesting:

Bitter gourd fruits are typically harvested when they are still green and tender. Overripe fruits tend to become excessively bitter and lose their culinary appeal. Regular harvesting encourages continuous fruit production.


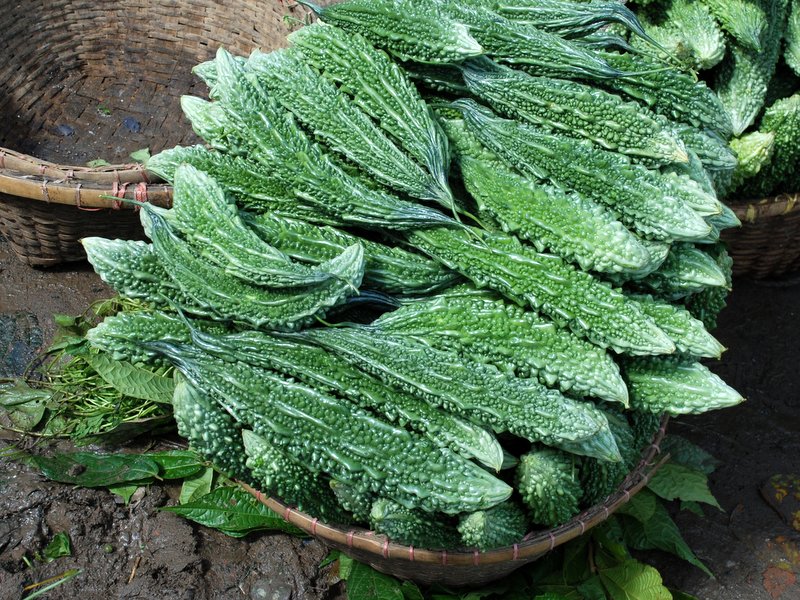
Fig: Harvesting of Bitter Gourd


10. Post-Harvest Handling:

After harvesting, bitter gourds should be handled carefully to avoid bruising or damage. They can be stored in a cool, well-ventilated area or in the refrigerator for a few days.

Bitter gourd cultivation practices can vary based on the region, climate, and specific variety being grown. It’s important to stay updated with local agricultural extension services or experts for the most relevant and up-to-date cultivation guidelines.

11. Conclusion:

Bitter gourd cultivation in India is a significant agricultural practice that combines tradition, nutrition, and medicinal value. With its distinct bitter taste, bitter gourd has long been a staple in Indian cuisine and traditional medicine. The cultivation process involves careful consideration of factors such as climate, soil, varieties, and pest management. India’s diverse climate zones provide suitable conditions for bitter gourd cultivation across the country. From the plains of North India to the coastal regions of the South, farmers adapt their practices to match local climates. The choice of varieties, including traditional landraces and modern hybrids, allows farmers to select plants that thrive in their specific microenvironments.

Cultivating bitter gourd demands attention to detail throughout its growth cycle. The sowing and transplanting times are critical, influenced by the onset of warm temperatures. Trellising systems are employed to support the vigorous vine growth and ensure healthy fruit development. Proper fertilization, incorporating organic manure and balanced nutrients, contributes to robust plants and yields. While bitter gourd is a hardy crop, it faces challenges from pests and diseases. Integrated pest management strategies are employed to minimize chemical intervention and promote sustainability. Farmers employ a combination of cultural practices, biological controls, and targeted pesticide use to safeguard their crops.

The outcome of bitter gourd cultivation is not just nutritional sustenance but also the continuation of cultural practices that have been passed down through generations. Bitter gourd dishes are an integral part of Indian cuisine, offering unique flavors and contributing to the country’s rich culinary heritage. Moreover, the bitter gourd’s medicinal properties, including its role in managing diabetes and improving digestion, underscore its value beyond the dinner table.

Agriculture Infrastructure Fund’s “Bharat Campaign” Spurs Progress: 33,369 Projects Garner Rs 26,064 Crores

Date: 12-08-2023

In a significant stride towards bolstering India’s agricultural sector, the Agriculture Infrastructure Fund has unveiled the ambitious “Bharat Campaign,” marking a milestone moment for the country’s farmers and rural communities. With a resounding commitment to uplifting agricultural infrastructure, a whopping Rs 26,064 crores have been greenlit for a staggering total of 33,369 projects. This landmark initiative comes as a beacon of hope for the agricultural community, addressing critical needs and amplifying growth prospects in the sector. The “Bharat Campaign” underlines the government’s unwavering dedication to providing modern, efficient, and sustainable infrastructure solutions to support the backbone of India’s economy.

The sanctioned funds will be channelled into diverse projects spanning the entire agricultural spectrum, encompassing storage facilities, cold chains, processing units, and more. By investing in these strategic areas, the campaign aims to bridge crucial gaps in the supply chain, reduce post-harvest losses, and enhance the overall value of agricultural produce.

The Agriculture Infrastructure Fund’s “Bharat Campaign” is poised to yield multifaceted benefits. Firstly, it will invigorate rural economies by generating employment opportunities and driving economic growth. Secondly, it aims to ensure that farmers receive fair prices for their produce while enhancing consumer access to quality goods. Additionally, these projects are anticipated to catalyse agricultural innovation, technology adoption, and sustainable practices, thereby fortifying India’s agricultural competitiveness on the global stage.

Government officials and agricultural experts alike are lauding the “Bharat Campaign” for its potential to usher in a new era of prosperity for India’s farming communities. As the funds begin to flow and projects take root, the campaign is expected to yield transformative outcomes, harmonizing modern infrastructure with traditional agricultural wisdom.

The Agriculture Infrastructure Fund’s resolute commitment to fortifying the nation’s agricultural backbone, exemplified by the “Bharat Campaign,” is a testament to India’s vision of progress, sustainability, and inclusive growth. With Rs 26,064 crores dedicated to 33,369 projects, a robust foundation is being laid for a thriving future in Indian agriculture – one that promises to enrich the lives of countless farmers and propel the nation towards self-sufficiency and prosperity.

Profitable Cultivation of Bottle Gourd, Its Varieties, Pest & Disease Management: A Comprehensive guide

Bottle gourd, scientifically known as Lagenaria siceraria, is a versatile and nutritious vegetable that belongs to the gourd family, Cucurbitaceae. It is commonly cultivated and consumed in various parts of the world, especially in Asian and African countries. The name “bottle gourd” is derived from the distinctive elongated and curvy shape of the mature fruit, which resembles a bottle or flask. The vegetable is also known by different names in various regions, such as calabash gourd, white-flowered gourd, and long melon. The bottle gourd plant is characterized by its large, heart-shaped leaves and sprawling vines that can cover substantial areas. It produces both male and female flowers, with the female flowers eventually developing into the fruit. The fruit starts as a tender, edible vegetable when young, and its flesh is pale green with a mild, slightly sweet flavor. As it matures, the skin becomes harder and develops a pale yellow color. At this stage, the flesh becomes less palatable and is usually discarded, while the hard-shelled gourd can be dried and used for various practical purposes, such as making utensils, containers, and decorative items.

In terms of culinary uses, young bottle gourds are popularly used in various dishes, including curries, stews, soups, and stir-fries. The mild taste of the vegetable allows it to absorb flavors from spices and other ingredients, making it a versatile addition to many recipes. Additionally, bottle gourd is revered in some cultures for its potential health benefits. It is considered low in calories, rich in dietary fiber, and packed with essential vitamins and minerals, such as vitamin C, vitamin B complex, potassium, and iron. This nutritional profile is believed to contribute to digestive health, hydration, and overall well-being. Beyond its culinary and nutritional value, bottle gourd has also been used in traditional medicine systems in some regions. It is believed to have diuretic properties and has been used to treat conditions like urinary tract infections and hypertension. However, it’s important to note that while bottle gourd does offer several health benefits, excessive consumption can lead to adverse effects due to the presence of certain compounds. For instance, mature bottle gourds contain toxic compounds called cucurbitacins, which can cause digestive discomfort and other health issues if consumed in large amounts.

Cultivating bottle gourd (Lagenaria siceraria), also known as calabash or long gourd, can be a rewarding endeavor. It is a warm-season vegetable that belongs to the gourd family (Cucurbitaceae). Here’s a general guide to bottle gourd cultivation:

1. Soil Preparation:

Choose a well-drained, fertile soil with a pH level of 6.0 to 7.5. Incorporate organic matter like compost or well-rotted manure into the soil before planting to improve its texture and nutrient content.

2. Climate and Temperature:

Bottle gourd thrives in warm climates. It requires plenty of sunlight and prefers temperatures between 70°F to 95°F (21°C to 35°C).

3. Bottle Gourd Growing Season

In India, the bottle gourd (Lagenaria siceraria) is typically grown as a warm-season vegetable, thriving in the tropical and subtropical climate that the country experiences. The growing season for bottle gourd in India varies depending on the specific region and local climatic conditions. Generally, the best time to plant bottle gourd seeds or seedlings is during the warmer months when temperatures are consistently high and frost is not a concern.

The primary growing seasons for bottle gourd in different parts of India are as follows:

  • Summer Season (March to June):

In many regions of India, bottle gourd is commonly grown during the summer months, starting from March and extending through June. During this period, the weather is warm and conducive to the rapid growth of the plant. Bottle gourd plants thrive in the heat and sunlight, and the longer daylight hours during the summer support their vegetative and reproductive growth.

  • Monsoon Season (June to September):

In certain parts of India, where the monsoon rains are significant, bottle gourd can also be cultivated during the monsoon season. The abundant moisture during this time supports the growth of the plant. However, it’s important to ensure proper drainage to prevent waterlogging, which can be detrimental to the plant’s health.

  • Late Winter to Early Spring (October to February):

In some regions with milder winters, bottle gourd can be grown during the late winter to early spring months. The temperatures during this period are cooler but still within the acceptable range for bottle gourd cultivation. It’s crucial to avoid frost, as cold temperatures can damage or kill the plants.

Keep in mind that the specific planting and harvesting times can vary based on the local climate and regional differences within India. If you’re planning to grow bottle gourd, it’s recommended to consult local agricultural extension offices or experienced local farmers for precise timing and recommendations tailored to your area. Additionally, selecting appropriate varieties suited to your climate and understanding proper cultivation practices will contribute to a successful bottle gourd harvest.

4. Varieties of Bottle Gourd

There are several varieties of bottle gourd (Lagenaria siceraria) that have been developed over time to suit different preferences and growing conditions. These varieties can vary in terms of size, shape, color, and taste. Here are a few notable varieties of bottle gourd:

  • Long Bottle Gourd (Lagenaria siceraria var. longissima):

As the name suggests, this variety is known for its elongated shape, resembling a traditional bottle. It is commonly used for culinary purposes when young, and its pale green skin and mild flavor make it suitable for various dishes.

  • Round Bottle Gourd (Lagenaria siceraria var. depressa):

This variety has a more rounded or bulbous shape compared to the elongated form of the long bottle gourd. It is also used in cooking when young, and its texture and taste are similar to the long bottle gourd.

  • Sponge Gourd (Luffa aegyptiaca):

Also known as “dishcloth gourd” or “luffa,” this variety is cultivated for its mature, fibrous interior that can be dried and used as a natural scrubber or sponge. The young sponge gourd can also be cooked and consumed.

  • Indian Round Gourd (Lagenaria siceraria var. clavata):

This variety has a round, club-like shape and is often used in Indian cuisine. It is popular for making a traditional dish called “dudhi halwa” and is valued for its flavor and texture.

  • Korean Bottle Gourd (Lagenaria siceraria var. hispida):

This variety has a distinctive ridged or spiny skin, giving it a unique appearance. It is commonly used in Korean cuisine for soups, stews, and side dishes.

  • Opal Bottle Gourd (Lagenaria siceraria var. opalina):

This variety is known for its striking pale green skin with white speckles or markings. It is often used for ornamental purposes and is less commonly consumed as a vegetable.

  • Apple Gourd (Lagenaria siceraria var. hardwickii):

This variety resembles a small, round apple and is used both for culinary purposes and as an ornamental gourd.

  • Bitter Gourd (Momordica charantia):

While not a true bottle gourd, bitter gourd is often categorized as a gourd variety due to its similar appearance. It has a distinctively bitter taste and is commonly used in Asian cuisines for its potential health benefits.

5. Sowing Seeds:

Bottle gourd can be grown from seeds directly in the garden or started indoors in seedling trays. Sow the seeds about ½ to 1 inch deep and space them about 2 to 3 feet apart. If transplanting, do so when the seedlings have developed a few true leaves.

6. Watering:

Bottle gourd requires consistent moisture, especially during flowering and fruiting. Water deeply but avoid waterlogging, as excessive moisture can lead to root rot.

7. Trellising and Support:

Consider providing a trellis or support for the vines, as this can promote healthier growth and make harvesting easier. As the vines grow, gently guide them onto the trellis.

8. Manuring & Fertilization:

The quantity of manure and fertilizers needed for bottle gourd plants can vary based on factors such as soil fertility, local climate, and the use of organic materials. However, here are some general guidelines for applying manure and fertilizers to bottle gourd plants:

I. Organic Matter (Manure and Compost):
  • Before planting, incorporate well-rotted compost or aged manure into the soil to improve its structure, water-holding capacity, and nutrient content. This can be done at a rate of 1 to 2 buckets (about 10-20 kg) per square meter of planting area.
  • You can also apply additional compost or manure as a side dressing around the base of the plants during the growing season to provide a slow release of nutrients.
II. Nitrogen (N):
  • Nitrogen is important for vegetative growth and overall plant health. Apply nitrogen-rich fertilizers before planting and throughout the growing season.
  • A general guideline is to apply about 1 to 1.5 grams of nitrogen per square meter of planting area. This can be achieved using nitrogen-rich organic fertilizers or synthetic fertilizers with a balanced N-P-K ratio (e.g., 10-10-10).
III. Phosphorus (P) and Potassium (K):
  • Phosphorus supports root development and flowering, while potassium promotes fruit development and overall plant vigor.
  • Apply about 0.5 to 1 gram of phosphorus and potassium per square meter of planting area. This can be achieved using fertilizers with a higher middle and last number in their N-P-K ratio (e.g., 5-10-10).
IV. Micronutrients:
  • Bottle gourd plants also benefit from micronutrients such as iron, zinc, manganese, and boron. These are often included in balanced fertilizers or can be applied separately according to soil test recommendations.
V. Frequency of Application:
  • Divide the total recommended amount of fertilizer into multiple applications throughout the growing season. For example, you can apply a portion of the fertilizer at planting or transplanting and then make additional applications every 4-6 weeks during active growth.
VI. Avoid Over-Fertilization:
  • While nutrients are essential, over-fertilization can lead to excessive vegetative growth and reduced fruit production. It can also contribute to nutrient runoff and environmental issues. Follow recommended application rates and consider conducting a soil test to determine specific nutrient needs.
VII. Mulching:
  • Applying organic mulch, such as straw or leaves, around the base of the plants helps conserve moisture, suppress weeds, and improve soil structure. Mulch also gradually breaks down, adding nutrients to the soil.

9. Pollination:

Bottle gourd plants have separate male and female flowers. Bees and other pollinators are essential for proper fruit set. If you notice a lack of pollinators, you can hand-pollinate by transferring pollen from male to female flowers using a small brush.

10. Pest and Disease Management:

Pest and disease management is crucial to ensure the health and productivity of your bottle gourd plants. Here are some common pests and diseases that can affect bottle gourd plants, along with preventive measures and treatment options:

Pests:
  • Aphids: These small insects suck sap from plant leaves, causing them to curl, yellow, and distort. They can also transmit plant viruses.

Prevention and Treatment: Use insecticidal soap, neem oil, or a strong stream of water to wash aphids off the plants. Introduce natural predators like ladybugs and lacewings to control aphid populations.

  • Squash Bugs: These flat, shield-shaped bugs feed on plant sap, causing wilting, yellowing, and death of leaves. They can be especially damaging to young plants.

Prevention and Treatment: Regularly inspect the undersides of leaves and remove eggs and nymphs by hand. Neem oil and insecticidal soaps can also help control squash bugs.

standard-sizing

Fig: Squash Bugs on the leaf of Bottle Gourds


  • Cucumber Beetles: These beetles feed on leaves, stems, and fruits. They can transmit bacterial wilt, a disease that affects cucumber and squash plants.

Prevention and Treatment: Use floating row covers to protect young plants from cucumber beetle infestations. Diatomaceous earth and neem oil can help control adult beetles.

Diseases:
  • Powdery Mildew: This fungal disease appears as a white powdery substance on the leaves, leading to stunted growth and reduced fruit production.

Prevention and Treatment: Provide good air circulation by spacing plants properly and avoiding overhead watering. Fungicidal sprays containing sulfur or potassium bicarbonate can help control powdery mildew.

  • Downy Mildew: Another fungal disease, downy mildew causes yellow spots on the upper leaf surface and a grayish fuzz on the undersides.

Prevention and Treatment: Plant resistant varieties if available. Remove and destroy infected plant material. Apply fungicides containing copper or mancozeb as a preventive measure.

  • Bacterial Wilt: Spread by cucumber beetles, this disease causes wilting, browning, and eventual death of plants. Once infected, there is no cure.

Prevention: Use row covers to prevent cucumber beetle infestations. Remove and destroy infected plants promptly.

  • Fusarium and Verticillium Wilts: These soil-borne fungal diseases cause yellowing, wilting, and death of leaves. They affect the vascular system of the plant.

Prevention and Treatment: Rotate crops to prevent disease buildup in the soil. Plant disease-resistant varieties. There is no cure for infected plants; remove and destroy them.

  • Anthracnose: This fungal disease causes dark, sunken lesions on leaves, stems, and fruits.

Prevention and Treatment: Plant disease-resistant varieties. Maintain proper spacing for good air circulation. Remove and destroy infected plant parts.

bottel-gourd-disease

Fig: Symptom of Downy Mildew Disease in Bottle Gourds


General Prevention Tips:

  • Choose disease-resistant varieties when available.
  • Practice crop rotation to reduce disease buildup in the soil.
  • Provide proper spacing between plants for good air circulation.
  • Avoid overwatering; water at the base of the plants to keep foliage dry.
  • Remove and destroy infected plant material promptly.
  • Apply organic or chemical treatments as recommended and according to label instructions.

Regular monitoring and prompt action are essential for effective pest and disease management. By practicing good cultural practices and using appropriate treatments, you can help ensure the health and productivity of your bottle gourd plants.

  1. Harvesting:

Bottle gourds are ready for harvest when they reach their mature size and have a glossy appearance. Use a sharp knife or pruning shears to cut the gourd from the vine, leaving a short stem attached. Harvesting at the right time ensures better taste and texture.

  1. Storage:

Bottle gourds can be stored in a cool, dry place for several weeks. Make sure they are well-ventilated to prevent Mold growth.

In conclusion, bottle gourd is a unique and versatile vegetable that has been enjoyed for its culinary and potential health benefits in various cultures. While its young and tender form is commonly used in cooking, its mature fruit has been employed for practical and decorative purposes. As with any food, moderation is key to reaping the benefits of bottle gourd while avoiding potential adverse effects.

Health Benefits of Pumpkin Seeds & Their Nutrient Value

Pumpkins are versatile and iconic members of the gourd family, often associated with autumnal festivities and culinary delights. These round, orange-hued fruits are not only visually appealing but also boast a rich history and diverse uses. From Halloween decorations to delicious pies and soups, pumpkins have woven themselves into various aspects of human culture and cuisine. Pumpkin seeds, also known as pepitas, are a nutritious and versatile food that offer a range of health benefits. Here are some potential health benefits of pumpkin seeds:

1. Nutrient-Rich:

Pumpkin seeds are a good source of essential nutrients, including protein, healthy fats, fibre, vitamins (such as vitamin K), and minerals (such as magnesium, phosphorus, iron, zinc, and manganese).

2. Heart Health:

The high levels of magnesium, potassium, and antioxidants in pumpkin seeds may contribute to heart health by helping to regulate blood pressure, reduce inflammation, and support overall cardiovascular function.

3. Prostate Health:

Pumpkin seeds have been associated with supporting prostate health in men. They contain compounds like phytosterols and zinc, which may help maintain prostate health.

4. Bone Health:

The combination of minerals in pumpkin seeds, such as magnesium, phosphorus, and zinc, can contribute to maintaining strong and healthy bones.

5. Digestive Health:

Pumpkin seeds are a good source of dietary fibre, which supports healthy digestion and may help prevent constipation.

6. Antioxidant Properties:

Pumpkin seeds contain antioxidants, including vitamin E and various phytochemicals, which help protect cells from oxidative damage and may reduce the risk of chronic diseases.

7. Improved Sleep:

Pumpkin seeds are a natural source of tryptophan, an amino acid that can contribute to the production of serotonin and melatonin, neurotransmitters that regulate sleep.

8. Blood Sugar Regulation:

The combination of fibre, healthy fats, and protein in pumpkin seeds may help stabilize blood sugar levels, making them a suitable addition to a balanced diet for people with diabetes.

9. Weight Management:

The fibre and protein content of pumpkin seeds can help promote feelings of fullness and reduce overall calorie intake, potentially aiding in weight management.

10. Immune Support:

Pumpkin seeds contain nutrients like zinc and antioxidants that are important for a healthy immune system and may help the body fight off infections.

11. Skin Health:

The vitamins, minerals, and fatty acids in pumpkin seeds can contribute to healthy skin, promoting a clear complexion and potentially reducing the signs of aging.

Nutrient Value of Pumpkin Seeds 

Pumpkin seeds, also known as pepitas, are a nutritious snack and culinary ingredient. Here’s nutrient value for pumpkin seeds per 100 grams:

  1. Calories: Around 559 kcal
  2. Protein: Approximately 30.23 grams
  3. Total Fat: About 49.05 grams
    • Saturated Fat: Around 8.67 grams
    • Monounsaturated Fat: Approximately 16.18 grams
    • Polyunsaturated Fat: About 21.58 grams
  4. Carbohydrates: Roughly 10.71 grams
    • Dietary Fiber: Around 6 grams
    • Sugars: Approximately 1.4 grams
  5. Vitamins and Minerals:
    • Vitamin K: About 7.3 micrograms
    • Vitamin E: Approximately 2.18 milligrams
    • Thiamin (Vitamin B1): Roughly 0.273 milligrams
    • Riboflavin (Vitamin B2): Around 0.153 milligrams
    • Niacin (Vitamin B3): About 4.987 milligrams
    • Vitamin B6: Approximately 0.143 milligrams
    • Folate (Vitamin B9): Roughly 58 micrograms
    • Pantothenic Acid (Vitamin B5): Around 0.750 milligrams
    • Iron: Approximately 8.82 milligrams
    • Magnesium: Roughly 262 milligrams
    • Phosphorus: About 1233 milligrams
    • Potassium: Approximately 809 milligrams
    • Zinc: Roughly 7.64 milligrams
    • Copper: Around 1.343 milligrams
    • Manganese: Approximately 4.543 milligrams
    • Selenium: Roughly 9.4 micrograms


neff-pumpkin-seeds

In conclusion, pumpkin seeds, or pepitas, offer a range of compelling health benefits that make them a valuable addition to your diet. Packed with essential nutrients and bioactive compounds, these small seeds can contribute to overall well-being in several ways.

Firstly, pumpkin seeds are a rich source of protein, making them an excellent option for those looking to increase their protein intake, especially for vegetarians and vegans. The amino acids found in pumpkin seeds support muscle repair and growth, aiding in maintaining a healthy body composition.

Secondly, their impressive content of healthy fats, including monounsaturated and polyunsaturated fats, contributes to heart health. These fats help reduce bad cholesterol levels, promoting cardiovascular wellness and reducing the risk of heart disease. The abundant array of vitamins and minerals in pumpkin seeds, such as magnesium, phosphorus, potassium, and zinc, play vital roles in various bodily functions. Magnesium, for instance, supports bone health, muscle function, and energy production. Zinc contributes to immune system strength, wound healing, and skin health. Pumpkin seeds are also a natural source of antioxidants, including vitamin E and carotenoids, which combat oxidative stress and help protect cells from damage. Their unique phytosterol content contributes to lowering cholesterol levels and promoting prostate health.

Furthermore, pumpkin seeds contain compounds like tryptophan and magnesium that may contribute to improved sleep quality and relaxation. Additionally, their fibre content aids in digestion and supports a healthy gut by promoting regular bowel movements. Incorporating pumpkin seeds into your diet can be a flavourful and convenient way to harness these health benefits. Whether enjoyed as a snack, added to salads, yogurts, or smoothies, or used in cooking and baking, pumpkin seeds offer a versatile and nutritious option that aligns with various dietary preferences.

Overall, pumpkin seeds stand as a wholesome and delicious addition to a well-rounded diet, offering an array of nutrients that can contribute to improved heart health, better digestion, enhanced immunity, and overall vitality. Remember that while pumpkin seeds offer numerous health advantages, they should be consumed as part of a balanced diet along with other nutrient-rich foods for optimal results.


Profitable Cultivation of Spiny Gourd, Growing Season, Manuring-Fertilizers, Disease and Pest Management: A Comprehensive Guide

Introduction:

The spiny gourd, scientifically known as Momordica dioica, is a plant belonging to the Cucurbitaceae family. It is also commonly referred to by various names, including spine gourd, teasel gourd, kantola, kakrol, and spiky gourd, among others. The plant is native to tropical and subtropical regions of Asia, including parts of India, Nepal, Bangladesh, and Southeast Asian countries. The spiny gourd is a climbing, perennial vine that produces distinctive, spiky fruits. These fruits are typically green, elongated, and covered in soft spines, which give the plant its common names. The spines are relatively gentle and do not cause harm upon touch. The fruit is harvested and consumed in various cuisines, particularly in South Asian and Southeast Asian dishes.

Both the immature and mature fruits of the spiny gourd are used for culinary purposes. The young, tender fruits are often cooked and eaten as a vegetable. They have a slightly bitter taste and are used in curries, stir-fries, and other dishes. In some regions, the mature, fully ripened fruits are also used for culinary purposes, often in pickles or preserves. Apart from its culinary uses, the spiny gourd has been studied for its potential health benefits. It is believed to have various medicinal properties, including antioxidant and anti-inflammatory effects. In traditional medicine systems, different parts of the plant, such as the fruits, leaves, and seeds, have been used to treat a range of ailments.

Overall, the spiny gourd is valued for its nutritional, culinary, and potential medicinal properties, making it an important component of certain regional cuisines and traditional healing practices.
Cultivating spiny gourd (Momordica dioica) involves several steps to ensure successful growth and a good harvest. Here’s a general guide to cultivating spiny gourd:

1. Climate and Soil Requirements:

Spiny gourd (Momordica dioica) cultivation requires specific climate and soil conditions for optimal growth and productivity. Here are the key climate and soil requirements for successfully growing spiny gourd:

Climate Requirements:
  • Temperature: Spiny gourd is a warm-season crop that thrives in tropical and subtropical climates. It requires temperatures between 25°C to 35°C (77°F to 95°F) for optimal growth. Temperatures below 15°C (59°F) can inhibit growth and lead to poor fruit development.
  • Frost-Free Period: Spiny gourd is highly sensitive to frost and should not be exposed to temperatures below 5°C (41°F). Therefore, it should be planted after the risk of frost has passed.
  • Sunlight: Spiny gourd is a sun-loving plant and requires full sunlight for at least 6 to 8 hours a day. Adequate sunlight ensures vigorous growth, flowering, and fruiting.
Soil Requirements:
  • Soil Type: Spiny gourd grows well in a range of soil types, including sandy loam, loam, and well-drained clay soils. However, the soil should be loose, friable, and well-draining to prevent waterlogging.
  • Soil pH: The optimal soil pH for spiny gourd cultivation is slightly acidic to neutral, ranging from 6.0 to 7.0. Soil pH influences nutrient availability and affects plant growth.
  • Soil Fertility: Spiny gourd benefits from fertile soils rich in organic matter. Adding well-rotted compost or aged manure to the soil before planting can enhance soil fertility and improve overall plant health.


2. Growing Season of Spiny Gourd In India

The growing season for spiny gourd (Momordica dioica) in India varies depending on the specific region, climate, and local conditions. Spiny gourd is a warm-season crop that thrives in tropical and subtropical climates. Here’s a general guideline for the growing season of spiny gourd in different parts of India:

  • Northern India:

In northern regions of India, such as Uttar Pradesh, Punjab, and Haryana, the optimal time for spiny gourd cultivation is during the warmer months of the year. The growing season typically starts from late March to early April and continues until September or October. Spiny gourd can be sown after the last frost and harvested before the onset of colder weather.

  • Central India:

States like Madhya Pradesh, Chhattisgarh, and Maharashtra experience a longer warm season. Spiny gourd can be planted from March to April, and the growing season extends until October or November. These regions have a more extended period of warm temperatures, allowing for a longer cultivation cycle.

  • Southern India:

In southern states such as Karnataka, Andhra Pradesh, Tamil Nadu, and Kerala, spiny gourd can be grown as a year-round crop due to the milder climate. The primary growing seasons are during the summer and monsoon months, from March to June and from September to November.

  • Eastern India:

In states like West Bengal, Odisha, and Bihar, spiny gourd can be grown during the warmer months, from March to June. Some areas might also have a second growing season from September to November.

  • Western India:

In regions like Gujarat and Rajasthan, the growing season for spiny gourd aligns with the warmer months, from March to June and then again from September to November.


3. Propagation:

Spiny gourd (Momordica dioica) can be propagated through both seeds and vegetative methods. Here’s how you can propagate spiny gourd using these techniques:

I. Seed Propagation:

Seed propagation is the most common method for propagating spiny gourd. Here’s how to do it:

  1. Seed Collection: Collect mature spiny gourd fruits from healthy plants. The fruits should be fully ripe and the seeds should be mature.
  2. Seed Extraction: Cut open the ripe fruit and remove the seeds. Wash the seeds thoroughly to remove any pulp or flesh.
  3. Drying: Allow the seeds to air dry in a shaded area for a few days. Ensure that they are completely dry before storage.
  4. Storage: Store the dried seeds in a cool, dry place in an airtight container. Properly stored spiny gourd seeds can remain viable for several years.
  5. Sowing: When you’re ready to plant, sow the spiny gourd seeds directly into prepared soil or in seedling trays. Plant the seeds about 2-3 cm deep.
  6. Germination: The seeds will germinate within 7 to 14 days, depending on temperature and soil conditions.
  7. Transplanting: Once the seedlings have developed a few true leaves, they can be transplanted into the main growing area. Choose a suitable spacing based on the growth habit of the spiny gourd variety.
II. Vegetative Propagation:

Vegetative propagation involves using parts of the parent plant to grow new plants. Spiny gourd can be propagated vegetatively through stem cuttings or layering.

1. Stem Cuttings:

  • Select healthy, disease-free stems from the parent plant.
  • Cut the stems into sections, each containing at least one node (the point where leaves emerge) and a few leaves.
  • Dip the cut ends in a rooting hormone to encourage root development.
  • Plant the cuttings in a well-draining rooting medium (e.g., a mixture of peat and perlite).
  • Keep the cuttings in a humid environment with indirect light. Maintain moisture and mist the cuttings if necessary.
  • Once roots have developed, the cuttings can be transplanted into the main growing area.

2. Layering:

  • Select a healthy, flexible stem that can be bent to the ground.
  • Make a shallow cut on the underside of the stem at a node, without detaching it from the parent plant.
  • Bury the wounded node in the soil, leaving the tip of the stem exposed above the soil surface.
  • Secure the buried section with a small stake or wire.
  • Roots will develop from the buried node over time.
  • Once roots are established, cut the rooted section from the parent plant and transplant it.

4. Irrigation:

Proper irrigation is essential for the successful growth and development of spiny gourd (Momordica dioica) plants. Maintaining consistent moisture levels in the soil helps ensure healthy plant growth, flower and fruit production, and overall crop yield. Here are some guidelines for irrigating spiny gourd:

I. Soil Moisture Monitoring:

Regularly monitor the moisture content of the soil to ensure that it remains adequately moist but not waterlogged. Use your judgment and consider the following indicators:

  • Soil Appearance: The soil should feel moist to the touch, but not overly wet. Avoid letting the soil dry out completely between watering.
  • Plant Response: Observe the spiny gourd plants for signs of water stress, such as wilting leaves. If you notice wilting during the hotter parts of the day, it’s a sign that the plants need water.
II. Irrigation Frequency:

The frequency of irrigation depends on various factors, including climate, soil type, and stage of plant growth. In general, spiny gourd plants require regular and consistent watering, especially during the growing season and flowering/fruiting stages.

  • Young Plants: Newly transplanted or germinated seedlings need more frequent watering to establish their root systems. Water them gently to prevent damage to delicate roots.
  • Flowering and Fruiting Stage: Maintain even moisture levels during flowering and fruiting, as water stress can affect fruit development and quality.

III. Watering Methods:

Choose appropriate watering methods based on your growing conditions and resources:

  • Drip Irrigation: Drip irrigation is an efficient way to deliver water directly to the root zone. It minimizes water wastage and reduces the risk of fungal diseases by keeping foliage dry.
  • Soaker Hoses: Soaker hoses can be placed along the base of plants to deliver a slow, steady stream of water to the soil.
  • Overhead Sprinklers: Overhead sprinklers can be used, but they should be set to operate during the early morning to allow foliage to dry quickly and reduce the risk of diseases.
IV. Watering Depth:

 Provide deep and thorough watering to encourage deep root development. Watering deeply encourages roots to grow deeper into the soil, making plants more resilient to drought conditions.

V. Mulching:

Apply a layer of organic mulch (such as straw, leaves, or compost) around the base of spiny gourd plants. Mulch helps retain soil moisture, reduces weed competition, and moderates soil temperature.

VI. Rainfall Considerations:

Adjust your irrigation schedule based on natural rainfall. Reduce irrigation during periods of consistent rain and increase it during dry spells.

VII. Avoid Waterlogging:

Ensure that the soil has proper drainage to prevent waterlogging, which can lead to root rot and other issues. If your soil has poor drainage, consider raised beds or amending the soil to improve drainage.

5. Manuring & Fertilization:

The quantity and application of manure and fertilizers for spiny gourd (Momordica dioica) cultivation depend on factors such as soil fertility, nutrient levels, and local conditions. Here’s a general guideline for applying manure and fertilizers to promote healthy growth and optimal fruit production:

I. Soil Testing:

Before applying any fertilizers or manure, it’s advisable to conduct a soil test to determine the nutrient status of your soil. Soil testing helps you understand which nutrients are deficient and allows you to tailor your fertilization plan accordingly.

II. Organic Matter (Manure and Compost):

Incorporating organic matter, such as well-rotted manure or compost, into the soil before planting is beneficial. Organic matter improves soil structure, water retention, and nutrient availability. Apply a layer of about 2-3 inches (5-7.5 cm) of compost or manure and incorporate it into the top 6-8 inches (15-20 cm) of soil.

III. Fertilizer Application:

The following is a general guideline for applying fertilizers to spiny gourd:

a. Nitrogen (N): Nitrogen promotes vegetative growth and overall plant health. Apply nitrogen-rich fertilizers based on the soil test recommendations or general guidelines:

  • At planting: Mix a balanced fertilizer (e.g., 10-10-10) into the soil at the recommended rate.
  • Side-dressing: Apply a nitrogen-rich fertilizer (e.g., urea) 4-6 weeks after planting. Use approximately 1 tablespoon (15 grams) of urea per plant, sprinkled around the base of each plant and lightly incorporated into the soil.

b. Phosphorus (P) and Potassium (K): Phosphorus supports root development, flowering, and fruiting, while potassium enhances fruit quality and disease resistance. Use a balanced fertilizer with adequate phosphorus and potassium content at planting.

c. Micronutrients: Spiny gourd may benefit from micronutrient supplementation if deficiencies are identified through a soil test. Apply micronutrient-rich fertilizers according to recommended rates.

  1. Frequency of Application: Divide the total recommended amount of fertilizer into several applications throughout the growing season. For example:
  • Pre-planting: Apply a portion of the fertilizer during soil preparation.
  • Side-dressing: Apply nitrogen-rich fertilizer during the active growth phase.

V. Avoid Excessive Fertilization: Over-fertilization can lead to nutrient imbalances, excessive vegetative growth, and reduced fruiting. Follow recommended rates and avoid applying fertilizers directly to plant leaves to prevent burning.


6. Pest and Disease Management:

Effective pest and disease management is crucial for the successful cultivation of spiny gourd (Momordica dioica). Integrated Pest Management (IPM) strategies that combine cultural, biological, and chemical control methods are recommended to minimize the use of synthetic pesticides. Here are some common pests and diseases of spiny gourd and their treatment options:

Pests:

1. Fruit Fly (Bactrocera spp.):

  • Treatment: Apply protein bait sprays containing insecticides like Spinosad or Imidacloprid. Place fruit fly traps with lures to monitor and reduce populations.

2. Aphids:

  • Treatment: Use insecticidal soaps, neem oil, or horticultural oils to suffocate and control aphids. Introduce natural predators like ladybugs or lacewings.

3. Whiteflies:

  • Treatment: Apply neem oil, insecticidal soap, or horticultural oils. Use yellow sticky traps to monitor and control adult whiteflies.

4. Leafhoppers:

  • Treatment: Insecticidal soaps or neem oil can help control leafhopper populations. Encourage beneficial insects such as parasitic wasps.
Diseases:

1. Powdery Mildew:

  • Treatment: Apply sulfur-based fungicides or neem oil at the first signs of infection. Maintain good air circulation, and avoid overhead watering to reduce humidity.

     2. Downy Mildew:

  • Treatment: Apply copper-based fungicides or biofungicides like Bacillus subtilis. Improve ventilation and avoid overhead watering.

3. Anthracnose:

  • Treatment: Apply fungicides containing chlorothalonil or copper-based products. Practice crop rotation and remove and destroy infected plant debris.

4. Fusarium Wilt:

  • Treatment: There are no effective chemical treatments for Fusarium wilt. Practice crop rotation and use disease-resistant varieties.

7. Harvesting:

  • Spiny gourd fruits are typically harvested when they are young and tender, about 2 to 3 inches in length.
  • Use a sharp knife or scissors to cut the fruits from the vine.
  • Regular harvesting encourages continued fruit production.

8. Uses:

  • Spiny gourd can be used in various culinary dishes, such as curries, stir-fries, and pickles.
  • The immature fruits are usually cooked and consumed, while mature fruits can be used for pickling.

9. Market Demand and Export:

Spiny gourd has gained popularity in various cuisines due to its unique flavor and potential health benefits. It is commonly used in Asian and Indian cooking. As international awareness of its nutritional value increases, there is potential for exporting spiny gourd and its products to global markets.

Pulses Face Soaring Prices, Impacting Consumers and Farmers Alike

As consumers around the nation scan grocery store shelves and farmers assess their crops, a new concern has taken root – the surging prices of pulses. These dietary staples, rich in protein and essential nutrients, have long been a cornerstone of diets across the country. However, recent spikes in prices have begun to bite into household budgets and raise questions about the sustainability of production. The sharp rise in pulse prices has been attributed to a complex interplay of factors. Erratic weather patterns, including unexpected rainfall and droughts, have disrupted cultivation in key pulse-producing regions. This has led to reduced yields and a subsequent strain on supply. Additionally, increased transportation costs and supply chain disruptions have further contributed to the upward pressure on prices.

Consumers, who rely heavily on pulses for nutrition and sustenance, are now feeling the pinch. Families are faced with difficult decisions as they navigate the trade-off between meeting their dietary needs and managing their budgets. The rise in pulse prices underscores the vulnerability of food systems to external shocks and the need for sustainable and resilient agricultural practices. Farmers, on the other hand, are grappling with the impacts of these price fluctuations on their livelihoods. As they confront the challenges of climate change and market volatility, many are reevaluating their crop choices and exploring alternatives. Agricultural experts emphasize the importance of diversification and the adoption of innovative farming techniques to mitigate the impact of price swings and promote food security.

Government agencies and agricultural organizations are working together to address the pulse price surge. Efforts to enhance agricultural infrastructure, improve storage facilities, and promote research into pulse cultivation are underway. Additionally, collaborative initiatives are being launched to provide farmers with access to real-time market information and crop management strategies.

In the face of these challenges, the rise in pulse prices serves as a wake-up call, prompting a reexamination of how we produce, distribute, and consume food. As communities come together to find solutions, the hope is that a resilient and adaptable agricultural sector will not only weather the current storm but also lay the groundwork for a more secure and sustainable food future.


Garlic Cultivation, Its Varieties, Pest -Disease Management, Fertilizes & Manuring: A Comprehensive Guide

Introduction:

Garlic (Allium sativum) is a bulbous plant that is widely used as a flavouring ingredient in cooking due to its strong and distinctive taste and aroma. It belongs to the Allium genus, which also includes onions, shallots, leeks, and chives. Garlic has been used for both culinary and medicinal purposes for thousands of years and is a staple ingredient in many cuisines around the world. Garlic bulbs consist of individual cloves, each encased in a papery skin. These cloves can be separated and used in various dishes, either raw or cooked. When garlic is crushed, chopped, or otherwise broken, it releases a compound called allicin, which is responsible for its characteristic pungent aroma and many of its health benefits.

In addition to its culinary uses, garlic has been associated with various potential health benefits, such as having antimicrobial, anti-inflammatory, and cardiovascular benefits. It has been studied for its potential to help lower blood pressure, reduce cholesterol levels, and boost the immune system, among other things. Garlic is often used to enhance the flavour of Savory dishes, including soups, sauces, marinades, and roasted meats. It can be consumed raw, sautéed, roasted, or used in powdered or paste form. In some cultures, it’s even used as a condiment or spread. The specific taste and intensity of garlic can vary based on its variety and how it is prepared. Cultivating garlic can be a rewarding venture, as it is relatively easy to grow and has a long shelf life when properly stored. In this comprehensive guide, we will explore the various aspects of garlic cultivation, from selecting the right variety to harvesting and post-harvest management.

1. Choosing the Right Garlic Variety

There are several varieties of garlic, each with its own unique flavour profile, appearance, and culinary characteristics. Here are a few important commercial varieties of garlic:

I. Softneck Garlic:

This type of garlic has a soft, pliable neck and is often the kind you find in grocery stores. It tends to have a milder flavour and is known for its long storage life. Softneck garlic varieties include:

    • Silverskin: A popular softneck variety with small cloves and a mild flavour. It’s commonly used for braiding due to its pliable stems.
    • Artichoke: Another softneck variety known for its large bulbs and cloves. It has a mild to medium flavour and is versatile for cooking.
II. Hardneck Garlic:

Hardneck garlic varieties have a stiff central stem (scape) that produces a flower head, or “scape,” before harvesting. They usually have fewer cloves per bulb than softneck varieties and often have a more robust flavour. Hardneck garlic varieties include:

      • Rocambole: This variety has a rich, full flavour and is often favoured by chefs. The cloves are arranged in a single circle around the stem.
      • Porcelain: Porcelain garlic has large, easy-to-peel cloves and a strong, robust flavour. It is known for its excellent storage qualities.
      • Purple Stripe: Purple Stripe garlic has a striking appearance with its purple-striped bulbs. It has a medium to strong flavour and is often used in gourmet dishes.
      • Marbled Purple Stripe: Similar to Purple Stripe garlic, this variety has a marbled appearance and a bold flavour.
III. Elephant Garlic:

Despite its name, elephant garlic (Allium ampeloprasum) is not a true garlic but rather a relative of the leek. It produces large bulbs with very large cloves that have a mild flavour. Elephant garlic is often used for its size and can be used in similar ways to garlic in cooking.

IV. Creole Garlic:

This group of garlic varieties is known for its spicy and pungent flavour. Creole garlic is often grown in warm climates and has a shorter storage life than some other varieties.

V. Asian Garlic:

Varieties like Asian White and Asian Tempest are known for their fiery flavour. They are often used in Asian cuisines for their distinct taste.

2. Site Selection and Soil Preparation:

Select a sunny location with well-drained soil for planting garlic. The soil should be loose, fertile, and rich in organic matter. Garlic prefers a slightly acidic to neutral pH range of 6.0 to 7.5. Prepare the soil by tilling it to a depth of 8-10 inches and incorporating compost or well-rotted manure to improve fertility.

3. Cultivating Period of Garlic in India

In India, the cultivation time for garlic typically varies based on the specific region and climate. Garlic is generally grown during the winter months when the weather is cooler and more conducive to its growth. Here’s a general guideline for garlic cultivation timing in different regions of India:

  • North India: In northern states like Punjab, Haryana, Uttar Pradesh, and Delhi, garlic is usually planted in October to November. It is harvested around April to May, before the onset of the hot summer.
  • Central India: States like Madhya Pradesh and Chhattisgarh also follow a similar planting schedule, with garlic being sown from October to November and harvested in April to May.
  • Western India: In states like Gujarat, Rajasthan, and Maharashtra, garlic is typically planted in October to November and harvested in April to May.
  • Southern India: In southern states like Andhra Pradesh, Tamil Nadu, Karnataka, and Kerala, garlic is often planted from November to December and harvested in April to May.


  1. Planting Garlic: Garlic is typically grown from individual cloves rather than seeds. To plant garlic:
  • Break the garlic bulb into individual cloves, keeping the papery skins intact.
  • Plant each clove with the pointed end facing up and the basal plate (root end) facing down. Plant cloves about 2-4 inches (5-10 cm) deep and space them 4-6 inches (10-15 cm) apart in rows.
  • Space rows about 12-18 inches (30-45 cm) apart.

4. Irrigation in Garlic Crops

The irrigation interval for garlic can vary based on factors such as local climate, soil type, and weather conditions. However, here are some general guidelines to help you determine the irrigation interval for growing garlic:


I. Soil Moisture Monitoring: The key to successful garlic cultivation is to maintain consistent soil moisture without overwatering. Garlic prefers well-draining soil that is evenly moist but not waterlogged. Use your fingers to check the moisture level in the soil. Stick your finger into the soil to a depth of about 1-2 inches (2.5-5 cm). If the soil feels dry at this depth, it’s time to water.

II. Early Growth Stage: During the initial growth stage (first few weeks after planting), garlic requires more frequent watering to help establish its roots. Water the soil whenever the top inch or so of soil feels dry. This may mean irrigating every 2-4 days, depending on weather conditions.

III. Bulb Development Stage: As the garlic plants continue to grow and bulb development begins, you can start to space out the irrigation intervals. Depending on your local climate, you might water every 5-7 days. The goal is to keep the soil consistently moist but not soggy.

IV. Late Growth and Harvest Period: In the weeks leading up to harvest, garlic bulbs need to mature and cure. During this time, reduce the frequency of watering to prevent excess moisture, which can lead to disease issues and affect bulb quality. Watering every 7-10 days or even less frequently might be appropriate during this stage.


5. Manuring & Fertilization:

Applying the right manure and fertilizer doses is crucial for successful garlic cultivation. Here’s a general guideline for manure and fertilizer application for growing garlic:

  • Organic Matter (Manure) Application:

    Before planting garlic, incorporate well-rotted organic matter, such as compost or aged manure, into the soil. This helps improve soil structure, fertility, and water-holding capacity. Spread a layer of compost or manure over the planting area and work it into the soil to a depth of 8-10 inches (20-25 cm).


  • Pre-Planting Fertilization:

Before planting garlic cloves, you can apply a balanced granular fertilizer to provide essential nutrients for early growth. Use a fertilizer with an N-P-K (nitrogen-phosphorus-potassium) ratio of around 10-10-10 or similar. Apply the fertilizer at a rate of about 1-2 tablespoons per square foot (15-30 grams per square meter) and mix it into the soil.


  • Side-Dressing During Growth:

As the garlic plants grow, you can provide additional nutrients through side-dressing with a nitrogen-rich fertilizer. Apply the fertilizer about 4-6 weeks after planting, when the plants are actively growing but before bulb formation begins. Use a fertilizer with a higher nitrogen content, such as one with a 20-10-10 or similar ratio. Apply the fertilizer at a rate of 1-2 tablespoons per square foot (15-30 grams per square meter) and lightly work it into the soil around the plants.


  • Scaping Stage:

When the garlic plants produce scapes (curly flower stalks), you can apply a small amount of fertilizer to support bulb development. Use a balanced fertilizer or a higher phosphorus fertilizer (with a higher middle number in the N-P-K ratio) to encourage bulb formation. Apply the fertilizer sparingly around the base of the plants.


  • Avoid Over-Fertilization:

While garlic does require nutrients for healthy growth, it’s important not to over-fertilize, as this can lead to excessive foliage growth at the expense of bulb development. Follow the recommended application rates and avoid applying fertilizer too close to the time of harvest.

6. Weed Control:

Weed control in garlic crops can be achieved through various methods, including cultural practices, manual weeding, and the use of herbicides. If you choose to use herbicides, it’s important to follow proper guidelines and safety measures. Here are a few herbicides commonly used for weed control in garlic crops, along with their applications:

  • Glyphosate:

Glyphosate is a broad-spectrum herbicide that is effective against a wide range of weeds. It is a non-selective herbicide, meaning it can kill both grasses and broadleaf weeds. Glyphosate is typically applied as a post-emergent spray when weeds are actively growing. It’s important to avoid spraying glyphosate directly on the garlic plants, as it can also damage or kill them.

  • Flumioxazin:

Flumioxazin is a pre-emergent herbicide that can be used to control weeds before they emerge. It forms a barrier in the soil that prevents weed seedlings from germinating. It is important to apply flumioxazin before planting garlic and incorporating it into the soil.

  • Oxyfluorfen:

Oxyfluorfen is a pre-emergent and post-emergent herbicide that targets broadleaf weeds and some grasses. It can be applied before garlic emergence or after emergence but before weed competition becomes significant.

  • Pendimethalin:

Pendimethalin is a pre-emergent herbicide that provides control of many grasses and some broadleaf weeds. It should be applied to the soil before garlic planting and incorporated into the soil.

Application Instructions:

When using herbicides in garlic crops, it’s important to follow these general steps:

  • Read the Label: Carefully read and understand the label instructions, precautions, and recommended application rates for the specific herbicide you are using.
  • Timing: Determine the appropriate timing for herbicide application. Pre-emergent herbicides should be applied before garlic planting and incorporated into the soil. Post-emergent herbicides should be applied when weeds are actively growing but before they become too large.
  • Spraying Technique: Use a handheld sprayer or a sprayer attached to a tractor. Ensure that the spray nozzle is calibrated to provide even coverage. Avoid spraying directly on the garlic plants.
  • Protect Garlic Plants: To prevent herbicide drift or overspray, use protective shields or cover the garlic plants with plastic sheets or other materials during application.
  • Safety Precautions: Wear appropriate personal protective equipment (PPE) while handling and applying herbicides. This may include gloves, protective clothing, and a mask.
  • Weather Conditions: Apply herbicides on a calm day to minimize drift. Avoid application during windy conditions or when rain is expected within the next 24 hours.
  • Post-Application Care: Monitor the garlic crop for any signs of herbicide damage. Follow up with appropriate irrigation and cultural practices to promote healthy garlic growth.


7. Disease and Pest Management:

Disease and pest control in garlic crops often involve the use of various chemicals known as fungicides (for diseases) and insecticides (for pests). However, it’s important to prioritize integrated pest management (IPM) practices that include cultural, biological, and chemical methods to minimize the use of chemicals and their potential impact on the environment. Here are some common disease and pest control chemicals along with their application guidelines for garlic crops:

Fungicides:
  • Mancozeb: Mancozeb is a broad-spectrum fungicide that can be used to control various fungal diseases in garlic, such as downy mildew and white rot. Apply as a foliar spray according to the label instructions. Begin applications preventively before disease symptoms appear and continue on a regular schedule based on disease pressure.
  • Copper-based Fungicides: Copper-based fungicides, such as copper sulfate or Bordeaux mixture, can help control fungal diseases like rust and botrytis. Apply as a preventative spray before disease development occurs. Avoid excessive use to prevent buildup of copper residues in the soil.
  • Azoxystrobin: This fungicide can be effective against foliar diseases, such as purple blotch and white rot. Apply according to label instructions, usually as a foliar spray. Rotate fungicides with different modes of action to reduce the risk of developing resistant pathogens.
Insecticides:
  • Pyrethroids: Pyrethroid insecticides, such as permethrin or bifenthrin, can be used to control a variety of insect pests, including aphids, thrips, and caterpillars. Apply as a foliar spray when pest populations reach economic thresholds. Be cautious of potential harm to beneficial insects.
  • Neem Oil: Neem oil is an organic insecticide that disrupts insect growth and development. It can help control aphids, mites, and certain other pests. Apply as a foliar spray according to label instructions. Neem oil also has fungicidal properties that may help control some fungal diseases.
  • Spinosad: Spinosad is effective against caterpillars, thrips, and other pests. It is derived from naturally occurring soil bacteria and is considered relatively safe for beneficial insects. Apply as a foliar spray when pests are present.
  • Diatomaceous Earth: Diatomaceous earth is a natural, abrasive powder that can be used to control crawling insects like slugs, snails, and aphids. Apply it around the base of garlic plants or as a barrier to pests.
Application Guidelines:
  • Always read and follow the label instructions for the specific fungicide or insecticide you are using.
  • Apply chemicals during the cooler parts of the day to minimize stress on garlic plants and to reduce the risk of volatilization.
  • Rotate different fungicides and insecticides with different modes of action to prevent the development of resistance in disease or pest populations.
  • Monitor your garlic crop regularly for signs of diseases and pests. Apply chemicals only when necessary and when pest or disease levels reach economic thresholds.
  • Consider using biological controls, such as beneficial insects, as part of an integrated pest management approach to reduce the need for chemical treatments.
  • Practice proper hygiene, such as removing and destroying infected plant material, to prevent the spread of diseases.


Fig: Effect of Pest and Disease on Garlic Crops


  1. Bulb Development and Harvesting:

Bulb development and harvesting are crucial stages in the growth cycle of garlic. Proper timing and techniques during these phases contribute to the quality and size of your garlic bulbs. Here’s a guide to bulb development and harvesting of garlic:

Bulb Development:

  • Vegetative Growth: After planting garlic cloves, the plants will go through a vegetative growth phase. During this time, the garlic will establish its root system and begin producing leaves.
  • Bulb Initiation: As the plants continue to grow, they will transition from vegetative growth to bulb initiation. This is usually signaled by the appearance of a visible swelling at the base of the stem.
  • Leaf Dieback: As bulb development progresses, you’ll notice the lower leaves starting to turn yellow and die back. This is a natural process as the plant directs its energy toward bulb formation.
  • Maturation: The upper leaves will remain green and healthy as the bulbs continue to develop. The number of green leaves can provide an indication of the maturity of the bulbs. When there are about five to six green leaves left, the garlic is nearing maturity.


Fig: Bulb Development in Garlic Crop


Harvesting:

  • Timing: Garlic is usually ready for harvest when about half of the leaves have turned brown and died back. This timing can vary depending on the garlic variety, local climate, and planting date. Harvesting too early can result in underdeveloped bulbs, while harvesting too late can lead to splitting and reduced storage quality.
  • Lift Carefully: To harvest garlic, use a garden fork or shovel to gently loosen the soil around the bulbs. Avoid damaging the bulbs as you lift them from the ground.
  • Curing: After harvesting, gently brush off excess soil from the bulbs, leaving the outermost layers intact. Allow the garlic bulbs to cure by placing them in a well-ventilated, shaded area with good air circulation. You can hang them in bundles or place them on racks. Curing usually takes about 2-4 weeks and helps improve the flavor and storage life of the bulbs.
  • Trimming: Once the garlic bulbs are fully cured, trim the roots to about 1 inch (2.5 cm) and cut the tops to leave about 1-2 inches (2.5-5 cm) of stem. This helps prevent moisture loss and provides a neat appearance.
  • Storage: Store cured garlic bulbs in a cool, dry place with good air circulation. A dark, well-ventilated pantry or basement is ideal. Avoid storing garlic in the refrigerator, as the cold temperature can cause premature sprouting.


Fig: Mature Garlic Bulb


9. Post-Harvest Handling:

After harvesting, allow the garlic bulbs to dry and cure in a warm, dry, and well-ventilated area. This process can take 2-4 weeks and helps improve the flavor and storage life of the garlic. Once cured, trim the roots and tops, leaving about an inch of stem. Store the garlic in a cool, dry, and dark place, where it can last for several months.

Conclusion:

Growing garlic can be a delightful and fruitful experience for farmers and Agriprenours, whether you are a seasoned gardener or a beginner. By following the guidelines outlined in this comprehensive guide, you can successfully cultivate flavourful and healthy garlic that will enhance your culinary creations and contribute to earn higher income.