Garlic Cultivation, Its Varieties, Pest -Disease Management, Fertilizes & Manuring: A Comprehensive Guide
Introduction:
Garlic (Allium sativum) is a bulbous plant that is widely used as a flavouring ingredient in cooking due to its strong and distinctive taste and aroma. It belongs to the Allium genus, which also includes onions, shallots, leeks, and chives. Garlic has been used for both culinary and medicinal purposes for thousands of years and is a staple ingredient in many cuisines around the world. Garlic bulbs consist of individual cloves, each encased in a papery skin. These cloves can be separated and used in various dishes, either raw or cooked. When garlic is crushed, chopped, or otherwise broken, it releases a compound called allicin, which is responsible for its characteristic pungent aroma and many of its health benefits.
In addition to its culinary uses, garlic has been associated with various potential health benefits, such as having antimicrobial, anti-inflammatory, and cardiovascular benefits. It has been studied for its potential to help lower blood pressure, reduce cholesterol levels, and boost the immune system, among other things. Garlic is often used to enhance the flavour of Savory dishes, including soups, sauces, marinades, and roasted meats. It can be consumed raw, sautéed, roasted, or used in powdered or paste form. In some cultures, it’s even used as a condiment or spread. The specific taste and intensity of garlic can vary based on its variety and how it is prepared. Cultivating garlic can be a rewarding venture, as it is relatively easy to grow and has a long shelf life when properly stored. In this comprehensive guide, we will explore the various aspects of garlic cultivation, from selecting the right variety to harvesting and post-harvest management.
1. Choosing the Right Garlic Variety
There are several varieties of garlic, each with its own unique flavour profile, appearance, and culinary characteristics. Here are a few important commercial varieties of garlic:
I. Softneck Garlic:
This type of garlic has a soft, pliable neck and is often the kind you find in grocery stores. It tends to have a milder flavour and is known for its long storage life. Softneck garlic varieties include:
-
- Silverskin: A popular softneck variety with small cloves and a mild flavour. It’s commonly used for braiding due to its pliable stems.
- Artichoke: Another softneck variety known for its large bulbs and cloves. It has a mild to medium flavour and is versatile for cooking.
II. Hardneck Garlic:
Hardneck garlic varieties have a stiff central stem (scape) that produces a flower head, or “scape,” before harvesting. They usually have fewer cloves per bulb than softneck varieties and often have a more robust flavour. Hardneck garlic varieties include:
-
-
- Rocambole: This variety has a rich, full flavour and is often favoured by chefs. The cloves are arranged in a single circle around the stem.
- Porcelain: Porcelain garlic has large, easy-to-peel cloves and a strong, robust flavour. It is known for its excellent storage qualities.
- Purple Stripe: Purple Stripe garlic has a striking appearance with its purple-striped bulbs. It has a medium to strong flavour and is often used in gourmet dishes.
- Marbled Purple Stripe: Similar to Purple Stripe garlic, this variety has a marbled appearance and a bold flavour.
-
III. Elephant Garlic:
Despite its name, elephant garlic (Allium ampeloprasum) is not a true garlic but rather a relative of the leek. It produces large bulbs with very large cloves that have a mild flavour. Elephant garlic is often used for its size and can be used in similar ways to garlic in cooking.
IV. Creole Garlic:
This group of garlic varieties is known for its spicy and pungent flavour. Creole garlic is often grown in warm climates and has a shorter storage life than some other varieties.
V. Asian Garlic:
Varieties like Asian White and Asian Tempest are known for their fiery flavour. They are often used in Asian cuisines for their distinct taste.
2. Site Selection and Soil Preparation:
Select a sunny location with well-drained soil for planting garlic. The soil should be loose, fertile, and rich in organic matter. Garlic prefers a slightly acidic to neutral pH range of 6.0 to 7.5. Prepare the soil by tilling it to a depth of 8-10 inches and incorporating compost or well-rotted manure to improve fertility.
3. Cultivating Period of Garlic in India
In India, the cultivation time for garlic typically varies based on the specific region and climate. Garlic is generally grown during the winter months when the weather is cooler and more conducive to its growth. Here’s a general guideline for garlic cultivation timing in different regions of India:
- North India: In northern states like Punjab, Haryana, Uttar Pradesh, and Delhi, garlic is usually planted in October to November. It is harvested around April to May, before the onset of the hot summer.
- Central India: States like Madhya Pradesh and Chhattisgarh also follow a similar planting schedule, with garlic being sown from October to November and harvested in April to May.
- Western India: In states like Gujarat, Rajasthan, and Maharashtra, garlic is typically planted in October to November and harvested in April to May.
- Southern India: In southern states like Andhra Pradesh, Tamil Nadu, Karnataka, and Kerala, garlic is often planted from November to December and harvested in April to May.
- Planting Garlic: Garlic is typically grown from individual cloves rather than seeds. To plant garlic:
- Break the garlic bulb into individual cloves, keeping the papery skins intact.
- Plant each clove with the pointed end facing up and the basal plate (root end) facing down. Plant cloves about 2-4 inches (5-10 cm) deep and space them 4-6 inches (10-15 cm) apart in rows.
- Space rows about 12-18 inches (30-45 cm) apart.
4. Irrigation in Garlic Crops
The irrigation interval for garlic can vary based on factors such as local climate, soil type, and weather conditions. However, here are some general guidelines to help you determine the irrigation interval for growing garlic:
I. Soil Moisture Monitoring: The key to successful garlic cultivation is to maintain consistent soil moisture without overwatering. Garlic prefers well-draining soil that is evenly moist but not waterlogged. Use your fingers to check the moisture level in the soil. Stick your finger into the soil to a depth of about 1-2 inches (2.5-5 cm). If the soil feels dry at this depth, it’s time to water.
II. Early Growth Stage: During the initial growth stage (first few weeks after planting), garlic requires more frequent watering to help establish its roots. Water the soil whenever the top inch or so of soil feels dry. This may mean irrigating every 2-4 days, depending on weather conditions.
III. Bulb Development Stage: As the garlic plants continue to grow and bulb development begins, you can start to space out the irrigation intervals. Depending on your local climate, you might water every 5-7 days. The goal is to keep the soil consistently moist but not soggy.
IV. Late Growth and Harvest Period: In the weeks leading up to harvest, garlic bulbs need to mature and cure. During this time, reduce the frequency of watering to prevent excess moisture, which can lead to disease issues and affect bulb quality. Watering every 7-10 days or even less frequently might be appropriate during this stage.
5. Manuring & Fertilization:
Applying the right manure and fertilizer doses is crucial for successful garlic cultivation. Here’s a general guideline for manure and fertilizer application for growing garlic:
-
Organic Matter (Manure) Application:
Before planting garlic, incorporate well-rotted organic matter, such as compost or aged manure, into the soil. This helps improve soil structure, fertility, and water-holding capacity. Spread a layer of compost or manure over the planting area and work it into the soil to a depth of 8-10 inches (20-25 cm).
-
Pre-Planting Fertilization:
Before planting garlic cloves, you can apply a balanced granular fertilizer to provide essential nutrients for early growth. Use a fertilizer with an N-P-K (nitrogen-phosphorus-potassium) ratio of around 10-10-10 or similar. Apply the fertilizer at a rate of about 1-2 tablespoons per square foot (15-30 grams per square meter) and mix it into the soil.
-
Side-Dressing During Growth:
As the garlic plants grow, you can provide additional nutrients through side-dressing with a nitrogen-rich fertilizer. Apply the fertilizer about 4-6 weeks after planting, when the plants are actively growing but before bulb formation begins. Use a fertilizer with a higher nitrogen content, such as one with a 20-10-10 or similar ratio. Apply the fertilizer at a rate of 1-2 tablespoons per square foot (15-30 grams per square meter) and lightly work it into the soil around the plants.
-
Scaping Stage:
When the garlic plants produce scapes (curly flower stalks), you can apply a small amount of fertilizer to support bulb development. Use a balanced fertilizer or a higher phosphorus fertilizer (with a higher middle number in the N-P-K ratio) to encourage bulb formation. Apply the fertilizer sparingly around the base of the plants.
-
Avoid Over-Fertilization:
While garlic does require nutrients for healthy growth, it’s important not to over-fertilize, as this can lead to excessive foliage growth at the expense of bulb development. Follow the recommended application rates and avoid applying fertilizer too close to the time of harvest.
6. Weed Control:
Weed control in garlic crops can be achieved through various methods, including cultural practices, manual weeding, and the use of herbicides. If you choose to use herbicides, it’s important to follow proper guidelines and safety measures. Here are a few herbicides commonly used for weed control in garlic crops, along with their applications:
-
Glyphosate:
Glyphosate is a broad-spectrum herbicide that is effective against a wide range of weeds. It is a non-selective herbicide, meaning it can kill both grasses and broadleaf weeds. Glyphosate is typically applied as a post-emergent spray when weeds are actively growing. It’s important to avoid spraying glyphosate directly on the garlic plants, as it can also damage or kill them.
-
Flumioxazin:
Flumioxazin is a pre-emergent herbicide that can be used to control weeds before they emerge. It forms a barrier in the soil that prevents weed seedlings from germinating. It is important to apply flumioxazin before planting garlic and incorporating it into the soil.
-
Oxyfluorfen:
Oxyfluorfen is a pre-emergent and post-emergent herbicide that targets broadleaf weeds and some grasses. It can be applied before garlic emergence or after emergence but before weed competition becomes significant.
-
Pendimethalin:
Pendimethalin is a pre-emergent herbicide that provides control of many grasses and some broadleaf weeds. It should be applied to the soil before garlic planting and incorporated into the soil.
Application Instructions:
When using herbicides in garlic crops, it’s important to follow these general steps:
- Read the Label: Carefully read and understand the label instructions, precautions, and recommended application rates for the specific herbicide you are using.
- Timing: Determine the appropriate timing for herbicide application. Pre-emergent herbicides should be applied before garlic planting and incorporated into the soil. Post-emergent herbicides should be applied when weeds are actively growing but before they become too large.
- Spraying Technique: Use a handheld sprayer or a sprayer attached to a tractor. Ensure that the spray nozzle is calibrated to provide even coverage. Avoid spraying directly on the garlic plants.
- Protect Garlic Plants: To prevent herbicide drift or overspray, use protective shields or cover the garlic plants with plastic sheets or other materials during application.
- Safety Precautions: Wear appropriate personal protective equipment (PPE) while handling and applying herbicides. This may include gloves, protective clothing, and a mask.
- Weather Conditions: Apply herbicides on a calm day to minimize drift. Avoid application during windy conditions or when rain is expected within the next 24 hours.
- Post-Application Care: Monitor the garlic crop for any signs of herbicide damage. Follow up with appropriate irrigation and cultural practices to promote healthy garlic growth.
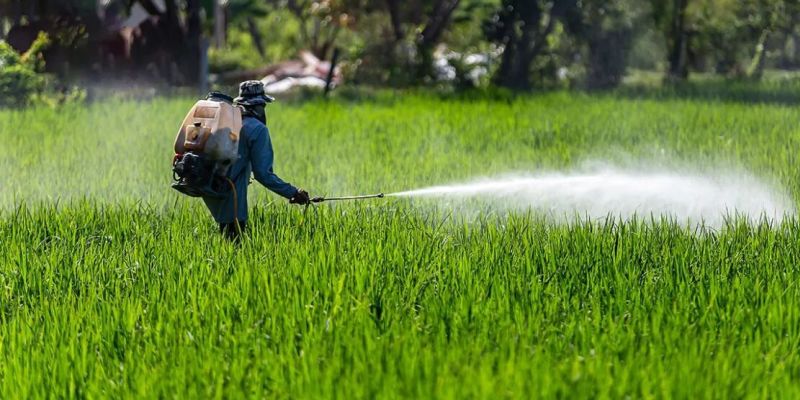
7. Disease and Pest Management:
Disease and pest control in garlic crops often involve the use of various chemicals known as fungicides (for diseases) and insecticides (for pests). However, it’s important to prioritize integrated pest management (IPM) practices that include cultural, biological, and chemical methods to minimize the use of chemicals and their potential impact on the environment. Here are some common disease and pest control chemicals along with their application guidelines for garlic crops:
Fungicides:
- Mancozeb: Mancozeb is a broad-spectrum fungicide that can be used to control various fungal diseases in garlic, such as downy mildew and white rot. Apply as a foliar spray according to the label instructions. Begin applications preventively before disease symptoms appear and continue on a regular schedule based on disease pressure.
- Copper-based Fungicides: Copper-based fungicides, such as copper sulfate or Bordeaux mixture, can help control fungal diseases like rust and botrytis. Apply as a preventative spray before disease development occurs. Avoid excessive use to prevent buildup of copper residues in the soil.
- Azoxystrobin: This fungicide can be effective against foliar diseases, such as purple blotch and white rot. Apply according to label instructions, usually as a foliar spray. Rotate fungicides with different modes of action to reduce the risk of developing resistant pathogens.
Insecticides:
- Pyrethroids: Pyrethroid insecticides, such as permethrin or bifenthrin, can be used to control a variety of insect pests, including aphids, thrips, and caterpillars. Apply as a foliar spray when pest populations reach economic thresholds. Be cautious of potential harm to beneficial insects.
- Neem Oil: Neem oil is an organic insecticide that disrupts insect growth and development. It can help control aphids, mites, and certain other pests. Apply as a foliar spray according to label instructions. Neem oil also has fungicidal properties that may help control some fungal diseases.
- Spinosad: Spinosad is effective against caterpillars, thrips, and other pests. It is derived from naturally occurring soil bacteria and is considered relatively safe for beneficial insects. Apply as a foliar spray when pests are present.
- Diatomaceous Earth: Diatomaceous earth is a natural, abrasive powder that can be used to control crawling insects like slugs, snails, and aphids. Apply it around the base of garlic plants or as a barrier to pests.
Application Guidelines:
- Always read and follow the label instructions for the specific fungicide or insecticide you are using.
- Apply chemicals during the cooler parts of the day to minimize stress on garlic plants and to reduce the risk of volatilization.
- Rotate different fungicides and insecticides with different modes of action to prevent the development of resistance in disease or pest populations.
- Monitor your garlic crop regularly for signs of diseases and pests. Apply chemicals only when necessary and when pest or disease levels reach economic thresholds.
- Consider using biological controls, such as beneficial insects, as part of an integrated pest management approach to reduce the need for chemical treatments.
- Practice proper hygiene, such as removing and destroying infected plant material, to prevent the spread of diseases.
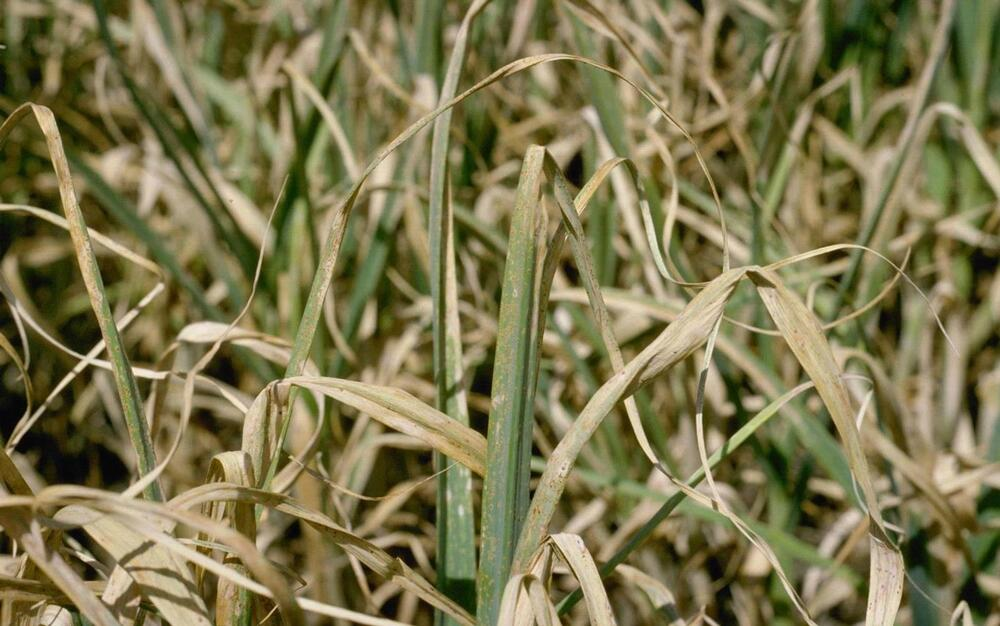
Fig: Effect of Pest and Disease on Garlic Crops
- Bulb Development and Harvesting:
Bulb development and harvesting are crucial stages in the growth cycle of garlic. Proper timing and techniques during these phases contribute to the quality and size of your garlic bulbs. Here’s a guide to bulb development and harvesting of garlic:
Bulb Development:
- Vegetative Growth: After planting garlic cloves, the plants will go through a vegetative growth phase. During this time, the garlic will establish its root system and begin producing leaves.
- Bulb Initiation: As the plants continue to grow, they will transition from vegetative growth to bulb initiation. This is usually signaled by the appearance of a visible swelling at the base of the stem.
- Leaf Dieback: As bulb development progresses, you’ll notice the lower leaves starting to turn yellow and die back. This is a natural process as the plant directs its energy toward bulb formation.
- Maturation: The upper leaves will remain green and healthy as the bulbs continue to develop. The number of green leaves can provide an indication of the maturity of the bulbs. When there are about five to six green leaves left, the garlic is nearing maturity.
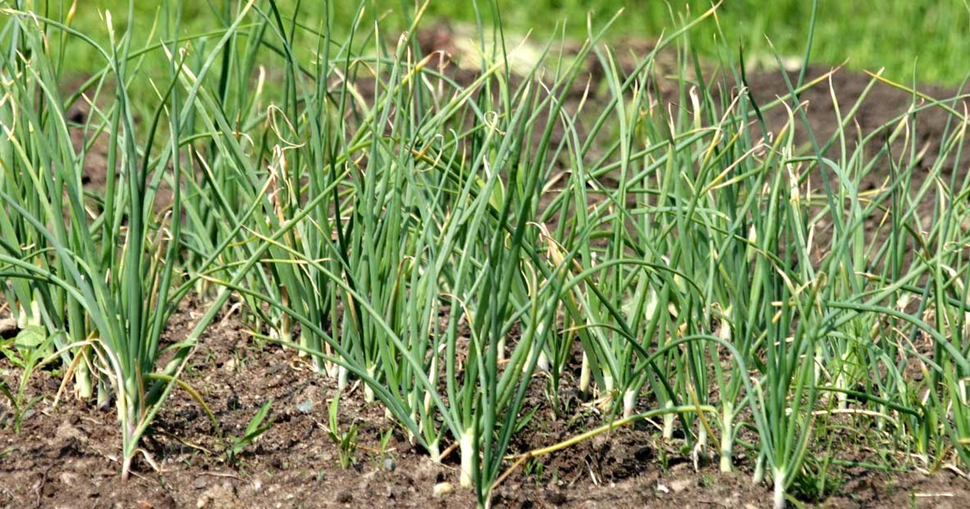
Fig: Bulb Development in Garlic Crop
Harvesting:
- Timing: Garlic is usually ready for harvest when about half of the leaves have turned brown and died back. This timing can vary depending on the garlic variety, local climate, and planting date. Harvesting too early can result in underdeveloped bulbs, while harvesting too late can lead to splitting and reduced storage quality.
- Lift Carefully: To harvest garlic, use a garden fork or shovel to gently loosen the soil around the bulbs. Avoid damaging the bulbs as you lift them from the ground.
- Curing: After harvesting, gently brush off excess soil from the bulbs, leaving the outermost layers intact. Allow the garlic bulbs to cure by placing them in a well-ventilated, shaded area with good air circulation. You can hang them in bundles or place them on racks. Curing usually takes about 2-4 weeks and helps improve the flavor and storage life of the bulbs.
- Trimming: Once the garlic bulbs are fully cured, trim the roots to about 1 inch (2.5 cm) and cut the tops to leave about 1-2 inches (2.5-5 cm) of stem. This helps prevent moisture loss and provides a neat appearance.
- Storage: Store cured garlic bulbs in a cool, dry place with good air circulation. A dark, well-ventilated pantry or basement is ideal. Avoid storing garlic in the refrigerator, as the cold temperature can cause premature sprouting.
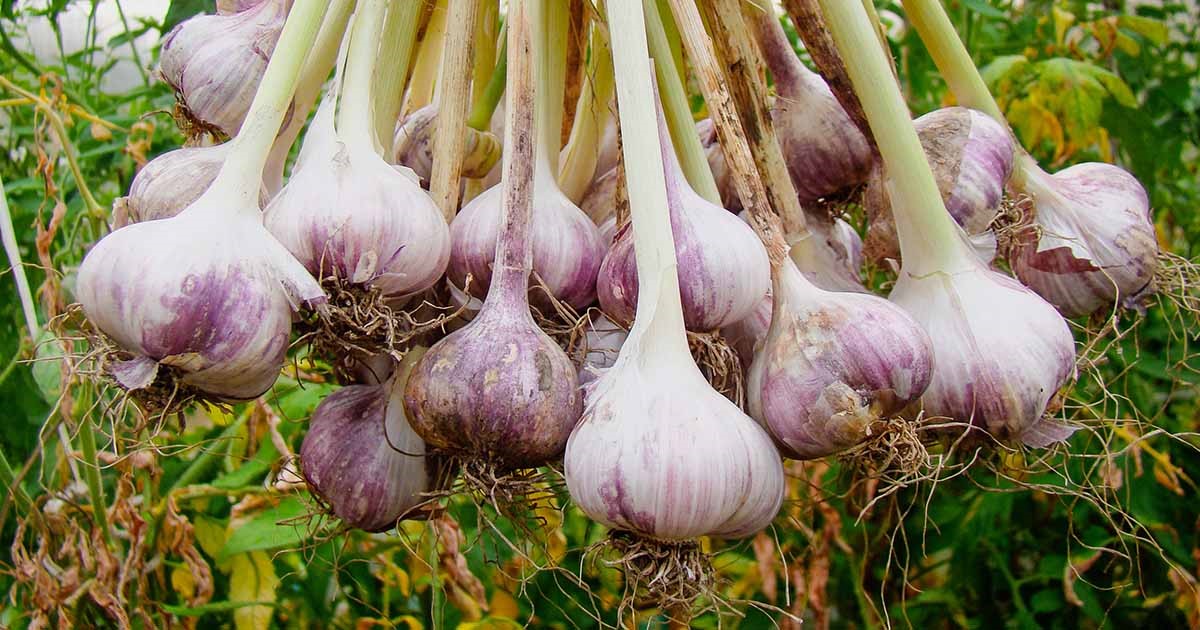
Fig: Mature Garlic Bulb
9. Post-Harvest Handling:
After harvesting, allow the garlic bulbs to dry and cure in a warm, dry, and well-ventilated area. This process can take 2-4 weeks and helps improve the flavor and storage life of the garlic. Once cured, trim the roots and tops, leaving about an inch of stem. Store the garlic in a cool, dry, and dark place, where it can last for several months.
Conclusion:
Growing garlic can be a delightful and fruitful experience for farmers and Agriprenours, whether you are a seasoned gardener or a beginner. By following the guidelines outlined in this comprehensive guide, you can successfully cultivate flavourful and healthy garlic that will enhance your culinary creations and contribute to earn higher income.